Thursday, October 27, 2016

News and Updates from Through the Needle's Eye

Houston, here we come!


We are preparing for our trip to the International Quilt Festival in Houston this weekend. We are leaving first thing on Saturday morning and checking out Quilt Market to see what is new in the quilt world. On Monday, we will take a class, and then we have a couple of unscheduled days to see what strikes our fancy. We may see what classes or lectures are still open or check out some quilt shops. Or perhaps we'll just stitch!

We are so excited to see our quilt, A Fairy Tale Album, left, on display at the show. It will be hanging in the special exhibit, In the American Tradition: Appliqué. That will most likely be the first thing we search for when we get there! Are you going to Quilt Festival in Houston? Perhaps we will see you there!


Academy of Appliqué 2017

Have you signed up to attend the Academy of Appliqué yet? The Academy is held in Williamsburg, Virginia, from February 27 through March 4. If you have never attended, it is hard to describe the instant kinship you feel with everyone there, who shares your passion. You may meet people from Ireland, California, or even Australia, but you'll have something to talk about, as if you'd always been friends. Pamper yourself . . . or start hinting that a week away to appliqué would be the PERFECT birthday, Christmas, anniversary, or "just because" gift! We would love to have you join us in one (or both) of our classes! For more information about the classes, go to needleseyestories.com or read our post, A Floral Wreath, The Secret Garden, and a new website!

Floral Wreath, February 28–March 1

The Secret Garden, March 2-4

Thursday, October 20, 2016

An Autumn Acorn Tutorial


Autumn is a favorite time of year for me, Kara. I love all the smells and tastes of fall, whether it's a bushel of apples, the smell of a pile of leaves, or all things pumpkin. Visually, I think it is the season with some of the most dramatic color changes, with the leaves changing into the most brilliant yellow, orange, and red hues. On our recent visit to Maine, the colors were just starting to come out, and signs of fall were everywhere. On one of my many walks through the Wells Reserve at Laudholm, I passed under a large oak that had begun to drop its acorns. I had been wanting to make some wool acorns for some time, so I collected a baggie of the caps to bring home with me.


Since we are now in the heart of the autumn season, I thought I would make a few of the acorns just to see how they turned out, and I am pretty happy with the results. First, I gathered my supply of wool in a fall palette, along with some of my Gentle Art Simply Wool thread and Valdani pearl cotton.


I made my pattern from a piece of card stock folded over about an inch. I drew half of an acorn shape on the fold and then cut it out.

The length is about one inch, and that seemed to work for most
of my acorn cap sizes.

This burnt orange wool from Shakerwood Woolens seemed like a good choice to start with, so I traced three acorn parts using my template.


With a strand of Burnt Orange Gentle Arts wool, I brought my thread through the bottom of the first piece on the inside.


 I then aligned the edges and blanket stitched the first two pieces together from bottom to top.


I tied off at the top and proceeded to add the third acorn piece, starting at the bottom again.


Two sides finished and ready to stitch the third.


Once all three sides were stitched together, I used some hand quilting thread (because of its strength) to make a series of gathering stitches all around the top of the acorn.


My gathering stitches

When I had finished going all the way around the top with the quilting thread, I left the needle threaded and stuffed the acorn with polyfill. Once I had enough stuffing, I pulled the gathering thread tightly and made a few straight stitches across the top to secure the gathers.

Stuffing 

The tied off acorn 

All that was left to do was use a little E6000 glue on the top of the wool acorn and add the cap. I did hold the acorn and cap tightly together for about a minute to give the glue a chance to set.

My first acorn

I liked the look of the matching wool and wool thread, but I thought it would be fun to experiment with contrasting colors and a different type of thread. So, for my next acorn, I chose a thicker burnt orange wool from Primitive Homespuns and a Valdani, pearl #12, and I decided to add a little embroidery on all three sides of the acorn. I added the embroidery once I had two of the sides put together.

The contrasting pearl cotton for the blanket stitch
The embroidery is finished, and I am getting ready to gather it.

The finished acorn with embroidery

Once I started making these, I had to force myself to stop. I experimented with different threads and wools to see what effect I liked best. 


The start of my collection

It's hard to stop at just one!

These would be lovely displayed on a small plate, or turned into a necklace, or even as an acorn garland. Hopefully, you will enjoy making these as much as I did! If you decide to make some, please send us pictures, as we would love to see where your creativity takes you. Happy Autumn!


SaveSave

Thursday, October 13, 2016

Revisting the Cabin

The quilt that founds its way home
A couple of months ago, Kara wrote about this lovely quilt and related the fascinating story of how it arrived back in its original home—the old log cabin in which it was made. (For the story of this quilt, read The Quilt That Found Its Way Back Home.)

Last month, Jane—one of the ladies we met at the cabin in June—emailed us to say:

"....and the story of the quilt continues....
I sent the blog to my friend Susan, who likes to quilt.  She immediately recognized the material as being from her grandparents' mill! Also, her mother, Peggy, played at the cabin as a child and remembers them quilting." 

Susan, however, had never seen either the quilt or the cabin. A follow-up lunch was proposed, so that Susan could see the quilt and share what she knew of its story. Sadly, we had to cancel our plan as Peg, the owner of the log cabin, became quite ill. As I (Teri) had taken quite a few more photos of this amazing cottage, we thought it might be nice to share the tasteful touches that Peg had added to the home as she refurbished it, staying true to the style of the log house. Enjoy!

The welcoming garden at Pleasant Springs Farm

Restored kitchen

The cozy parlor

I love this lace on the mantel!

Each piece of furniture and every accent could have been in the original cabin.
Except, of course, the addition of electric lamps!

Bedroom #1

A sitting room upstairs; of course there is a quilt on the couch!

Bedroom #2:

Needlework on the walls...

...and an embroidered dresser scarf on the bureau. (That is Peg in the mirror, giving us the grand tour of her log cabin.)

Such a beautiful, peaceful view from the window

Lovely flowers from the garden as a centerpiece on the table

One of my favorite pictures of the day—these three friends chatting: Peg, Bonnie, and Jane

That delightful day didn't end with our lunch. On our way home, we stopped to visit Bonnie's home, where she showed us this beautiful red and white quilt. Bonnie says that the quilt top was made by her great-grandmother, probably sometime in the mid-1800s. The top was passed down to Bonnie, and she had it quilted in the 1960s. Some friends from Bonnie's church made the Raggedy Ann and Andy dolls, who look perfectly happy sitting upon that gorgeous quilt!


What a perfect ending to a perfect day!


What a blessing it was to be able to meet Peg Coleman and hear the amazing story of her quilt. Kara and I are so grateful that we had the opportunity to spend an afternoon with this multi-talented, charming lady, and we are thankful that our friend Carol arranged for us to meet her. We were saddened by the the news of her passing last Friday. Though we only recently met Peg, we will forever remember her smile and caring nature, and her welcoming us into her home. She was indeed a special lady. Our condolences to her family and close friends. 

Thursday, October 6, 2016

Vintage Dimensional Appliqué

One of my (Kara's) favorite things to do on vacation is explore the local antique offerings. Antique stores of all types can be found. Some are really just buildings for garage sale-type items, or some that have "fine" as the first word of their name usually mean that what's inside will be above my budget. And some fit somewhere in the middle of that spectrum. While on vacation in Wells, Maine, last week, I took a day to see what treasures could be uncovered. I came across some interesting finds at a variety of antique shops. Some items I left behind, for obvious reasons.

I have no words for this

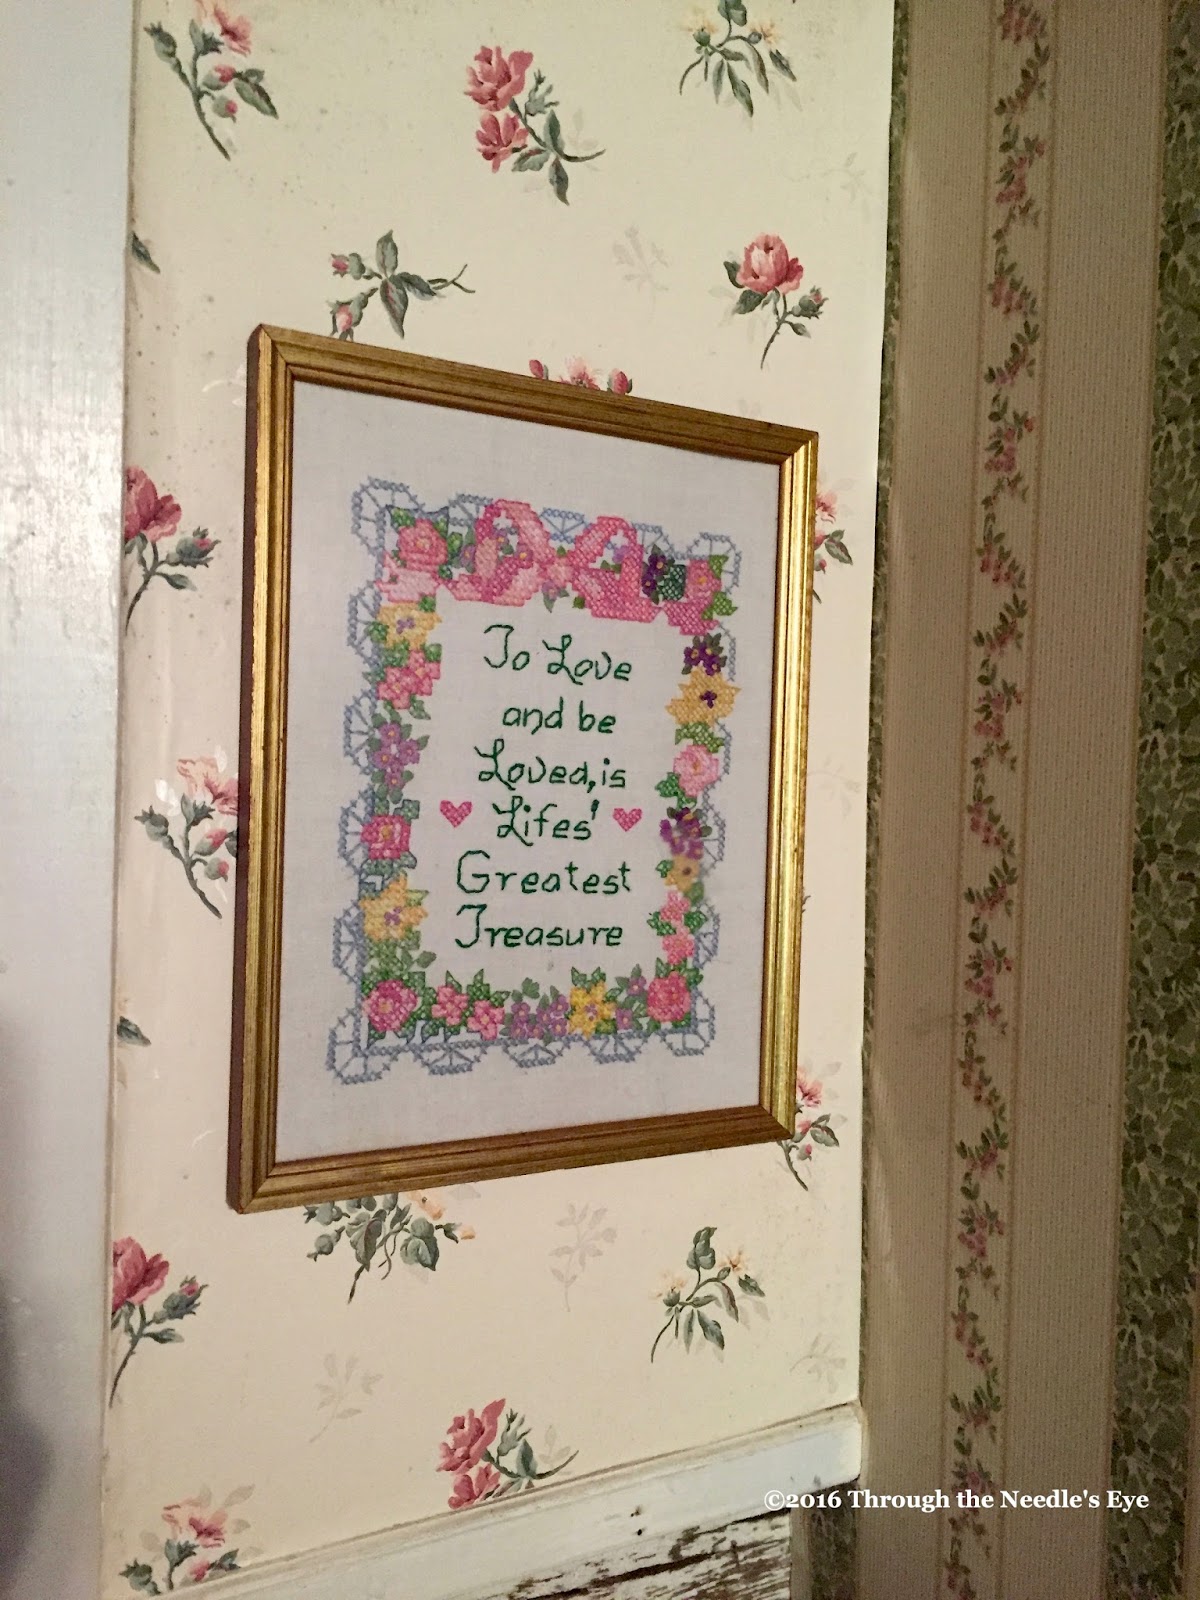
And of course, I am always drawn to anything with a fairy tale theme.

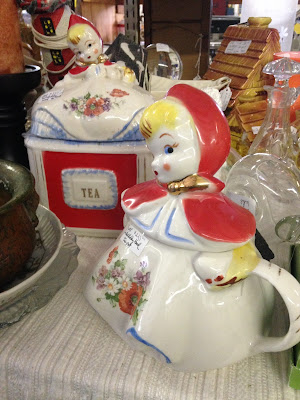
A very expensive Little Red Riding Hood

One store we visited was R. Jorgensen Antiques. Upon arriving, we were immediately impressed with the massive espaliered pear tree that graced the front of the shop.


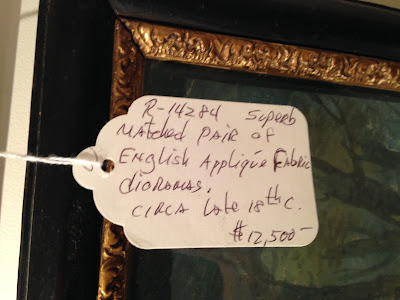
Inside, we were greeted by the resident German Shepherd, a gracious store owner,  and some amazing antiques. Since I am fascinated by all types of appliqué, I was immediately drawn to these two pieces.

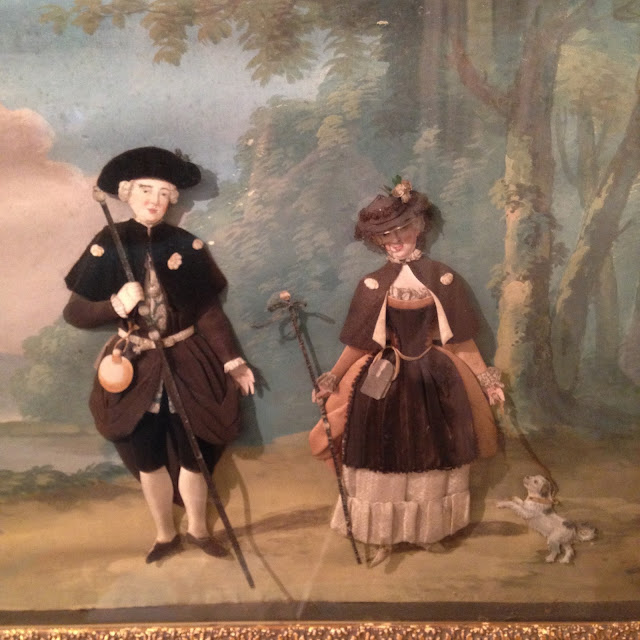
What a sweet little dog and such elaborate outfits

Such detail!

The detail of the second diorama was exquisite, and I wished I had taken more pictures. The owner shared that this appliquéd diorama tells a story about a friar, who raised a foundling in complete isolation from society. The picture depicts the scene when the, now adult, young man sees women for the first time.


He does look a bit shocked
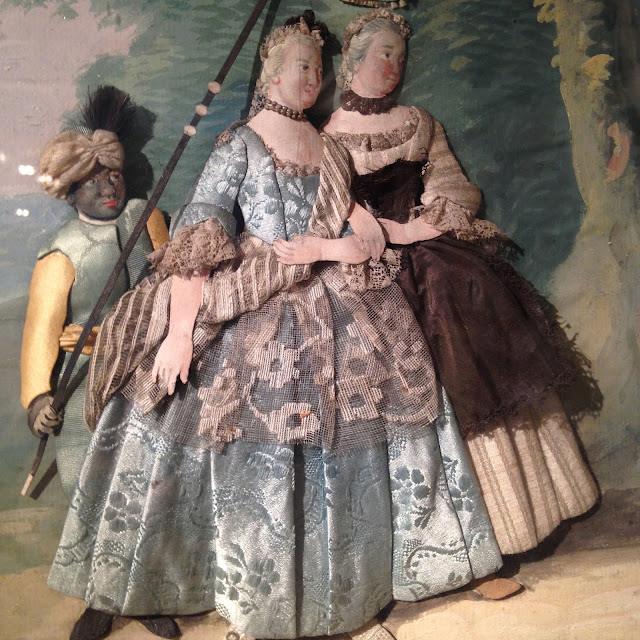
The attention to detail really shows in the ladies' dresses

It was suggested that this was a common story of that era, and that this depiction might have been reproduced for decor purposes. While the price tag eliminated me as a buyer, this piece of art definitely made me an admirer. 

Not in the budget

At the next antique store, I came across another appliquéd scene that showed these lovely ladies out for a stroll.


This was not the first time I had come across a shadowbox or diorama showing fashionable ladies. I found these two in a shop in St. Joseph, Michigan.


As I began to write this post, I knew I needed to find out more about this method of appliquéing fabric onto a pre-printed paper scene. After searching the web, it appeared that this was not an uncommon art form. Pinterest yielded quite a few images, and most of them used a Victorian fashion plate as the base. 

Ebay
I really thought that there would be a lot of information out there since I had found many of these shadow boxes available to purchase online, but there was very little information as to how they were made or why. The most prevalent artwork of this type available to purchase online, seems to be those based on fashion plates from the magazine, LaMode Illustrée, a fashion magazine first published in Paris in 1859. There are quite a few different pieces available through Ebay and Etsy for any collectors out there. Occasionally, they can be found in antique stores as well for those with a discerning eye.

Live Auctioneers

Did this art form give ladies who couldn't afford a high-fashion dress an opportunity to dream a little bit? Or were they used to demonstrate available fabrics that could be used to make the dresses? Certainly, this is just speculation on my part, since I couldn't find any specific information on the web. If any of our readers are able shed some light on this art form, we'd love to hear from you.

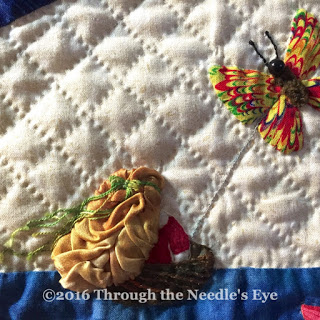
This dimensional appliqué that I've shared is from the past, but we can certainly utilize some of these ideas for our current appliqué projects. While looking at so many of these detailed pieces on the web and in antique stores, I realized that when I stitched our Beauty and the Beast block from our Fairy Tale Album (currently in Houston), I created Beauty's dress with similar techniques. Her skirt is gathered, and her hair, made out of silk, is gathered and pleated.

A gathered and pleated skirt add dimension

Teri used a furrowing technique for Thumbelina's hair.

Furrowed silk hair

Little Red Riding Hood's cape also has a few gathers to make it stand out a bit.


Hopefully you have enjoyed seeing some of the works of art from the past and will be inspired to add some dimension to your appliqué. Again, if you have any more information about the vintage appliquéd ladies, please share!