Pages

Thursday, December 28, 2017

Back-Basted Basket Weaving

In November, I (Teri) taught a workshop for the Baltimore Appliqué Society on this lovely flower basket block, made by Mildred Tahara. I wrote about this stunning quilt in the post, In Praise of Jane Austen: An Album Quilt, including close-up shots of the blocks Mildred made that will be BAS workshops. Elly Sienkiewicz designed the patterns Mildred used.

As I began stitching my model, I pondered the basket. My favorite appliqué method is back-basting, so I knew that would be how I'd construct my basket. I studied the baskets on both Elly's and Mildred's models. (Elly was kind enough to loan me her block.) When Elly first made the block, she used a solid piece of fabric and used reverse appliqué.

Basket, reverse appliquéd by Elly Sienkiewicz
What a perfect fabric for the basket!

Mildred also reverse appliquéd the basket with a single piece of fabric, but then she appliquéd the rectangles of white on top of it to give the basket an open look.

Basket appliquéd by Mildred Tahara

Since I was using Mildred's quilt as my teaching model, I wanted the basket to have the same look; however, I don't think I have the patience that Mildred must have, because I couldn't imagine me trying to appliqué all those skinny rectangles. So I decided to "weave" my basket, using the back-basting method. Here's what I did.

First, I marked every other spoke on the back, and basted them, using one piece of fabric. I then trimmed and appliquéd each of the spokes.

Next, I basted the cross-bar on top of those spokes, trimmed, and appliquéd it.

Here is the back of the piece, where the basket is marked. Note the light marked lines in the stitched spokes, which helped me place the first alternating spokes. Here, I am basting the remaining alternating spokes

The basting lines are marked on the outside of the spokes, so that when they are trimmed and the basting stitches are removed one at a time, the marked lines are my turning lines. 

As I stitched these spokes on top of the previous spokes and cross-bar, I got the illusion of having woven the basket fabric. But all I had to do was stitch straight lines...easy peasy!!

After the inside of the basket was finished, I basted one large piece of fabric over the entire basket design—the inside and the outside edges. I marked the basting lines with my white pencil.

First I trimmed—very carefully—along the inside edges and reverse appliquéd the inside of the basket.


After the inside was reverse appliquéd, I appliquéd around the outside edge of the basket, removing just a few basting stitches at a time, not more than an inch or so ahead of my appliqué stitches. 

You can see the woven look that is achieved.


And here is my finished basket!

I am nearly finished with the block. I just have a few flowers remaining to create and stitch. I will be teaching the second part of the this block in January, at which point I will share my version with you. It has been great fun to stitch this Flower Basket, inspired by both Elly and Mildred. 

There are many ways to stitch a basket. How might you go about weaving an appliquéd basket?


Sunday, December 24, 2017

Lo, How a Rose E'er Blooming

Lo, how a Rose e'er blooming from tender stem hath sprung!
Of Jesse's lineage coming, as men of old have sung.
It came, a floweret bright, amid the cold of winter,
When half spent was the night.


Isaiah 'twas foretold it, the Rose I have in mind;
Mary we behold it, the Virgin Mother kind.
To show God's love aright, she bore to us a Savior,
When half spent was the night.


The shepherds heard the story proclaimed by angels bright,
How Christ, the Lord of glory was born on earth this night.
To Bethlehem they sped and in the manger they found Him,
As angel heralds said.


This Flower, whose fragrance tender with sweetness fills the air,
Dispels with glorious splendor the darkness everywhere;
True man, yet very God, from sin and death He saves us,
And lightens every load.

~Traditional German Carol


We wish you a Merry Christmas 
and the happiest of holidays!!
May all your stitches be bright!


Thursday, December 21, 2017

I'm Dreaming of a White Solstice...

In the spirit of the holidays—and the first day of winter—we thought we would re-share the free snowflake pattern that we created last year. While it is a balmy 50-something degrees here in Maryland, there is snow in Germany. So yes, I (Teri) am a bit jealous of Kara's snowfall, but who am I to complain? At least I can create snow of the stitched kind! Take a peek at the snowflakes we made from the pattern.

Framed snowflake, appliquéd on linen

detail

Framed snowflake, appliquéd onto wool

detail

Wool snowflake, made as an ornament

detail

To read more about how we made our snowflakes and to get the free pattern, click on the links below:


Of course, if you live south of the equator, you are just beginning summer, and this gift might seem laughable. But even when it's hot, a flake of snow can always spread some cheer, right?

Kara and I both wish you the happiest of holiday seasons, and new year filled with blessings!


Thursday, December 14, 2017

"In the Garden"—Violets

Roses are red, 
Violets are blue.
God can make violets,
But so can YOU! 

At least you can, if you use ribbon! This month's Block of the Month in our In the Garden series will have you creating lovely violets out of wired ribbon. Are you ready? Here we go! I (Teri) will give you a quick pictorial tour of the methods used to create these life-like blooms, and  then you will be ready to start "planting." In our class this past weekend, I heard several "I can't make that" comments become "Wow! I CAN make this flower!"
December BOM: Violets

The Leaves
I cut the leaves out as one unit and delineated them with embroidery.
You could, if you prefer, cut them and appliqué them as separate units.
I staple them in place, and then carefully remove the staples after appliquéing. 

I used a Bohin chalk pencil to mark the lines between the leaves,
The chalk shows up easily on the wool, and doesn't last.

A chain stitch with two strands of floss outlines the individual leaves. On the edges, I took the needle from the background a tiny bit into the edge of the leaf, so that the chain "hugged" the raw edge.

To make the two center leaves pop and appear closer, I used a lighter wool thread to do a chain stitch on top of the
darker green floss chain stitch. Because the wool thread was a bit thinner, it nestled inside the previous chain.
Veins are then added using a stem stitch; I used size 12 pearl cotton.

The Flowers
Cut a piece of wired ribbon 5 1/2 inches long. Starting 1/4 inch from the edge,
mark lines on the ribbon at 1-inch intervals.

Along the first line, start at the bottom and do a running stitch by the line, and
across the top, just under the wire. Use a thick or doubled thread for gathering. 
 
When you reach the next marked line, stitch down one side and up the other. Be sure that your thread overlaps the edge of the ribbon. Gather to create your first petal.

Continue to do a running stitch and gather after each petal.

After gathering all five petals, knot the thread but leave the needle and thread in place.

Manipulate the petals into a flower shape, using the wired to shape the petals.

Use your needle as a tool to pull the center of the petals together.
Take some large stitches to secure the flower center.

Don't worry if it doesn't look perfect; the center knots will be added later.

Use tack stitches to secure the blooms to the background, stitching in the gathers of the
flowers with matching thread. The buds are created with two "petals" rather than five.

The Stems

A pekinese stitch was used to create the stems. I used a size 5 pearl cotton
to make a nice thick stem. First, mark the stem lines and do a back stitch. 

The thread is then woven on top of the piece through the backstitches. For a great tutorial of the pekinese stitch, click here.

We are having such fun creating these designs, and we hope you will join us on our BOM gardening journey. All patterns are available in our website store (https://www.needleseyestories.com/shop), and the ribbon is included with the pattern for those with ribbon blooms. Both digital and hard copy patterns are available, although to get the ribbon, you need to order a hard copy. (Like you couldn't guess that we wouldn't send you digital ribbon!) 😄

Happy stitching—let's make some violets!!


To read about the other blocks in our In the Garden series, click on the links below.


Thursday, December 7, 2017

Aloha from Germany!

Since arriving in Germany this past June, I (Kara) have jumped into a number of quilt guilds and groups. One group that I have joined is called the Baltimore Beauties. Many of the ladies there were once a part of a group that made a Baltimore Album quilt based on Mimi Dietrich's patterns; thus the name. The group has stuck together and now meets monthly to quilt, knit, or just to help develop their skills in English or German. Most of the ladies are German, but the love of quilting overcomes any language barriers. Their English is hands-down, way better than my German, and they graciously correct my inept pronunciations. Their willingness to teach even extends to cooking, as one of the ladies is going to teach a few of us how to make spaetzle, the traditional Swabian way.

Spaetzle: A staple around here. Click here for the recipe

On my very first visit to this group, Daniela, the organizer, mentioned that one of the local museums in Stuttgart was going to be presenting an exhibit about Hawaii. Somehow the idea of a sew-in of Hawaiian quilts was brought up, and our group was asked to stitch Hawaiian quilt blocks at the museum. Many agreed to participate, so for the next few months, we prepped and started our blocks. I purchased a few books with patterns; Amazon had a great deal on three books which I rationalized gave me more blocks to choose from! I chose to back-baste my block instead of constructing it in the traditional, Hawaiian way and found that it was the perfect method for this style of appliqué.

Three for $20! How could I pass it up?

The front.
The back.


A quarter of the way finished

As you can see, I haven't finished my block yet, but I needed something to stitch on for the sew-in (that's my excuse and I'm sticking with it). I forgot how much I enjoyed needle-turning batik fabric. Unfortunately, that block has been relegated down on the priority list, but I will finish it.

At the exhibit entrance.

Our sew-in day was November 29, and before we sat down to stitch, we were able to get a private tour with the curator of the exhibit. The items in the exhibit were gathered from all parts of the world, and surprisingly, most of the collections came from other European countries. 

The curator explaining how this particular textile was made.

The focus of the exhibit was about the tumultuous history of Hawaii and its colonization, so there was only one quilt in the exhibit; not in the traditional style, but made to share a political opinion. Of course, I was most interested in the textiles, so that is primarily what I will show you here.

A quilt made about the British rule.

A traditional kapa cloth made  of bark fibers
Kapa cloth detail


Most kapa cloth was used for clothing; the plain for the common man
and the patterned for the high-ranking families.

Kapa was also used for blankets.

Kapa was traditionally made by women using the fibres
of the wauke or Paper Mulberry. 
Since the 1980s, the forgotten tradition of making kapa
has been revived as a part of Hawaiian, textile. artistry.

Other textiles in this exhibit involved feathers—and a lot of them! The feathered cloaks and headdresses were considered sacred and worn as symbols of power.

a
All made of feathers attached to a web-like structure.

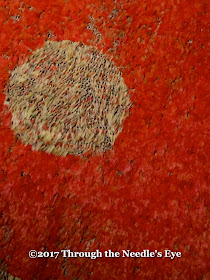
A close up of the feathers.

More feathered detail

This feathered cloak and helmet were designed to protect the head and spine,
which were thought to be sacred.

Helmet detail

"My! What big teeth you have!"

After our tour of these amazing artifacts, it was our turn to sit and stitch.  We had quite a few visitors stop by to watch us as we needle-turned our blocks. A couple of our ladies had already finished their blocks and were beginning to quilt them.

German and American quilters stitching Hawaiian appliqué!
You can't make this stuff up!

Beautiful, bright, tropical, colors!

We all had such a lovely time, and it was a wonderful opportunity on so many levels. It was so kind of the museum to invite us to share our appliqué passion with the museum goers. Have you tried Hawaiian appliqué? If so, we'd love to hear about your experience. 

Until next time, Aloha!