Thursday, May 5, 2016

Lovely Lane

A couple of weeks ago, the Baltimore Appliqué Society sponsored a trip to Lovely Lane United Methodist Church in Baltimore, Maryland, to hear a lecture from Marylou McDonald about the Baltimore Album Quilts housed in their museum. What an incredible treat! To be in the presence of these amazing works of art, stitched by women nearly 170 years ago, is awe-inspiring, to say the least.

There were four Baltimore Album Quilts and one whole-cloth quilt for us to view. The Album Quilts were all dated between the years 1846-1852, all made for pastors of Baltimore churches.


In the interest of inspiration, I (Teri) am going to let the quilts and blocks tell their stories. I hope that you will be just as moved as we were to study some of these blocks. They certainly have motivated me to try a few new techniques. And there are at least a few that I have put on my "must stitch" list. Enjoy!

This quilt was made for Reverend Best of the Bethel Mission, an interdenominational church for seamen.
This quilt faded quite a bit after being submerged in a river.

Seamans Bethel (Note: It actually reads Belhel; the t was not crossed.)

Cornucopia 

This quilt, bordered with chintz, was made for Rev. Robert Lipscomb

Detail of inscribed Bible block for the Reverend

Note the Rose of Sharon block beneath the star; there are six variations of this block on the next quilt. 

The lovely inked embellishments on this vase of flowers add such detail.

There is nothing I do not love about this vase of flowers.
The quilting is unique in each album block,  appropriately known as "album quilting." 

This quilt, the largest we saw, was made for Rev. George C. Roberts.

This was the first block to draw my eyes, since it was the first block that I taught as a class. To see my version, click here.

Several blocks on these quilts were done using the broderie perse style.

Here are five of the six Rose of Sharon blocks in the Roberts quilt, similar but not identical. I thought I had photographed them all, but I missed one. The sixth is pictured in the full quilt, above, to the left of the yellow star block. 

This quilt was made for Reverend Henry Wilson

Green Street Church block

Detail: Each brick and window pane is created with white sewing thread in a chain stitch.

Another lovely vase of flowers with inked embellishment

Check out these ruched flowers! And more lovely quilting to frame the vase.

Detail of ruching

The oldest of the quilts, there is some uncertainty as to whether it dates to the 1600s or 1700s. It is a white, whole-cloth quilt with a coarser fabric on the back. The channels were then stuffed. Originally, the quilting thread was blue, but at one point, when it was cleaned, the blue faded. This view looks to the center of the quilt.

A corner of the quilt

A view of the back, where you can see the stuffing.

A perfect ending to a perfect morning: enjoying some live spring flowers!


We hope you have enjoyed visiting these quilts with us. I have a few more photos of several additional blocks, but they may have to be a Part Two. There is no more photo-wrestling energy left in me today! 


Thursday, April 28, 2016

Thumbelina Dance, Thumbelina Sing

In our post, Fairy Tales Through the Needle's Eye, we showed you our fairy tale quilt and shared the story of its creation. We just found out that it has been accepted into the Houston International Quilt Festival in November! Let's just say there was a lot of screaming, dancing, and jumping up and down going on yesterday. We are still in disbelief that we are going to Houston to see our quilt.

Beauty from Beauty and the Beast
While the quilt top was with the quilter, we decided to work on a few other one-block projects using our patterns and different fabric choices. Teri is working on a baby quilt using the Cinderella pattern, and she will share that project soon. I (Kara) decided to tackle the Thumbelina block, but I planned on stitching it in wool. The Thumbelina fairy tale is by Hans Christian Anderson and tells of the travels and travails of a tiny girl, no bigger than your thumb, hence the name. The block incorporates various elements from that story. You can read the tale here.

This past August, Teri and I went to the Four County Quilters Guild Quilt Show in Frederick, MD. There were amazing quilts to be seen, as well as some wonderful vendors. One vendor that kept our attention was Shakerwood Woolens out of Rock Hill, South Carolina. We fell in love with the colors and the texture of Cathi's wools, and I bought enough for a design that I hoped to create based on a friend's coat. While I haven't made the project yet, at least I have the supplies ready.

This pattern is begging to be done in wool

As I began planning the Thumbelina project, I remembered Shakerwood and immediately went to their website. While it can be difficult to pick colors for a project from a website, the wool color from picture to reality was pretty true. Getting these luscious colors was like an extension of Christmas, and they were packaged so nicely!


I had never worked on a wool project quite this large (15"), but as it was winter when I was stitching, it helped to keep me warm.

And the stitching begins!


Once all the pieces were stitched onto the background, I began the fun part: embellishing the block with embroidery. I knew I wanted to use the Hungarian chain stitch for the cattail stems, and I also went back and did an outline stitch around the chain stitch to give it more definition. Just a few French knots in two shades of brown gave the depth I was looking for on the cattails.


I wasn't as sure about what to do for Thumbelina's hair, so I auditioned an upholstery trim-piece but decided it was a little too crazy.


For her hair I used two different colors of Gentle Arts wool thread and was quite pleased with the way it turned out.


I re-worked the stitching on the swallow about six times and finally went back to my original plan of keeping it simple.


The butterfly received a little bling in the form of a beaded body and some metallic silk stitching.


The beautiful shading of the pink wool meant that I really didn't need to do much embellishing on the lilies. Just a little outlining with a matching floss and a few details using a variegated silk thread were all they needed.


Once the embellishing was finished, I needed to decide on a border. When Teri and I were in Lancaster last year, I found these Moda Regent Street charm packs of lawn. Lawn comes in the most beautiful florals, and these were no exception; however, I didn't know when I bought them how perfect they would be for the Thumbelina project.

The colors in these lawn squares matched the wool perfectly

I wanted a delicate border that didn't overwhelm the piece, so I went with a one-inch blue inner border and two rows of one-inch lawn squares for the outer border.


I enjoy working with wool and the change it brings from regular fabric appliqué, and this project was so much fun. It was nice to see how well our patterns transitioned from fabric to wool, and I hope to do more of them. Do you favor wool or cotton appliqué, or both? Let us know your favorite!

Thursday, April 21, 2016

Stitching for Sister


When I (Teri) was young—as in the age of bickering with brothers—I always wanted a sister. I remember my mom telling me that women "make their own sisters." I thought that was easy for her to say: she has a sister! But as I've grown older and wiser (like my mom), I have realized the truth of that counsel. In addition to the blessing of my two brothers—with whom I no longer bicker—I have acquired sisters from my school family from my years as a teacher, sisters from my church family, and sisters from my stitching family. But one special sister has gone from being just a sister-in-law to simply being a "sister." To my children, she is their beloved "Aunt Millie." To me, she is my sister.

About ten years ago, when Millie bought her current home, she asked me to make her a table runner for her new dining room set. She told me the colors she wanted, and I set to work, finding a pattern and creating her runner. I chose batiks, which were lovely in the autumn palette she had chosen. Machine quilting is definitely NOT my thing, but I practiced and persevered, figuring this was the perfect size to manage.

A bit of meandering: not my favorite quilting activity

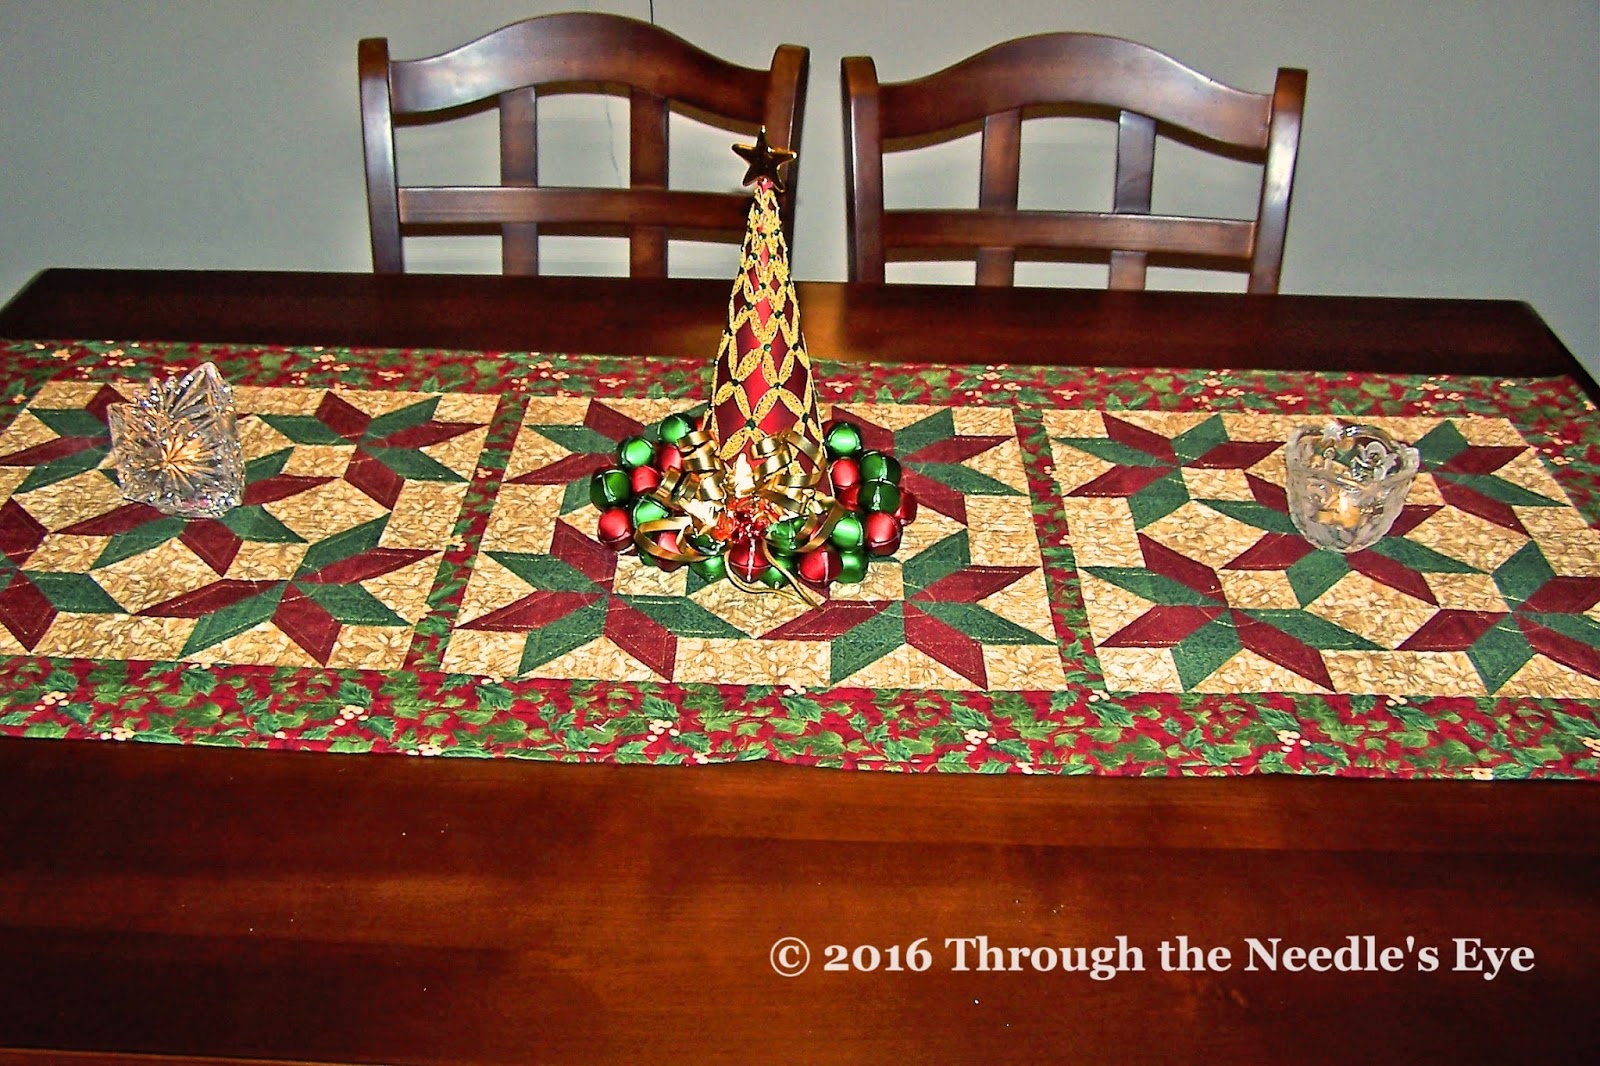
She was so thrilled with that one, she asked if I would make her a Christmas runner, so she could decorate for the holiday. This time, I simply chose a block pattern and used that as the basis for the runner design. I ramped up the quilting a bit, and crazily chose to do some of the quilting with metallic thread. What was I thinking?! But we both loved the effect of the metallic touches on the gold-flecked fabric.

Metallic sparkle in the stars

Free-motion filler in the background


That winter, I took a class in Hampton, Virginia, with Virginia Walton, learning to sew curves. We used gradient hand-dyed fabrics to create curved stars set amidst batik squares. I remember spending a bit too much time in class arranging my stack of 48 batik squares, so that the colors were just right. I never have been able to master "random." I have to carefully work to achieve the random look I want—I call it plandom. Anyway, my husband loved the quilt, so it went to his office. And Millie loved the stars, so I designed a table runner for her. Win, win!

Class quilt on curves: I worked hard to place the warm colors on the diagonal down the middle.

Resulting star design for table runner, and yes—more metallic quilting. Stars need sparkle!


The following summer, I took a class in Hershey, Pennsylvania, on stained-glass quilt designs, with Carol Blevins. The project was a one-block piece, which Millie liked, so I finished it and gave it to her. I then made four more blocks and arranged them to create her "summer runner."


With most of the seasons covered, Millie thought perhaps she should have a wintry design. She chose fabrics that she liked, again batiks, (notice a pattern, here?) and I used Electric Quilt to create the pattern. And now, she had one for each season, and she could change her table runners accordingly. We thought we were finished.


But then I found this line of fabric that screamed at us. We both come from Pennsylvania Dutch (German) roots. The designs in this fabric line tugged on my heart, so I naturally bought yardage, knowing I would find ways to use it. When I showed it to Millie, I knew she would want another runner. And she did, of course! 

We both loved this fabric, so reminiscent of the fraktur and distelfink designs we saw growing up.

Not long ago, I was at her house for lunch, and as we reminisced and I took pictures of her table, she started pointed out colors she liked, just in case I might want to make her another runner . . . 


After all, what are sisters for, anyway? I guess I'd better start designing a new table runner!