Thank you for your interest in our Flora and Fauna blocks! They are no longer free but will be part of a future quilt pattern.
Welcome to Block 3 of our free Block of the Month Stitch-Along! This month's block is the Amanita muscara or the fly agaric. It is definitely one of the most iconic mushroom varieties out there; it even has it's own emoji!🍄 I really wanted to see one of these on our walks so that I could take a picture of it and turn it into a block for the Stitch-Along. One parameter that I set for this series was that each block would always be designed based on something I had seen here in Germany on my walks with the dogs. Having a real picture side by side with the block was part of the plan for each blog post.
I see a lot of different mushrooms and toadstools on my meanderings with the furry beasts, but I had not come across this particular one on our local trails. My eyes were always scanning the woods for a sighting, but to no avail. On one of my walks, I did spot this cute little guy, but he wasn't the classic red and white spotted mushroom of storybooks.
 |
| This mushroom was almost hidden by the moss. |
At my local guild meeting, I was sharing my mushroom issues and received all sorts of advice as to where to find them—most of those places were quite a distance away. I despaired of seeing any this year, as many told me it was late in the season for them, but one of the ladies from the guild heard my plea and took this lovely picture for me.
 |
| What good eyes to have seen this one! |
Hooray! I may not have taken the picture but the point was to use a picture of the mushroom taken here in Germany. I was thrilled to be able to offer this as our next block, but before I prepared the design, my husband and I took a trip to the Black Forest. We took the pups with us on our hike, and then planned to have a slice of Black Forest cake as our reward for our exercise. While we were walking, I looked down...and there were the mushrooms I had been seeking! Right there in all their red and white glory. The dogs didn't understand my excitement, but my husband did, since for the last month, I had been talking about finding them. On to designing the block, with plenty of pictures now for inspiration.
 |
| In the bright sun, these almost looked metallic! |
Cotton Block
Finding just the right fabric for the cotton block was going to be a bit of a challenge, or so I thought. I selected three good possibilities, but I thought there was just enough of a red section in the sunset fabric to fit the pattern, so I decided to go with it.
 |
| Doesn't seem like it would work? |
 |
| All good options. |
Another challenge I faced was how to get the cream colored stem to stand out on a light background. I chose a piece of ombré cream ribbon for the stem as it had a different sheen than cotton, however it still blended in a bit too much. Thinking it needed a some more shading, I got out my oil pastels, and with a piece of muslin, lightly shaded one side of the ribbon.
 |
| I gently wiped the cloth onto the ribbon until I had just enough. |
Did the sunset fabric piece work? It sure did, and I was really pleased with the way the colors gave the mushroom top some depth. Even with the pastels, the stem needed to stand out a bit more, so I used one strand of light tan floss to stem stitch around the stem (no pun intended!)
 |
| The sunset fabric was perfect for this! |
Then it was time for the copious amount of French knots. I used The Gentle Art Simply Shaker Wool, in Toasted Marshmallow, for the knots. The white spots from the real mushroom are scattered haphazardly and vary in size, so I tried to do the same. Some of the knots have two wraps and some have three, and I also varied the tension of the wraps to change the shape up a bit.
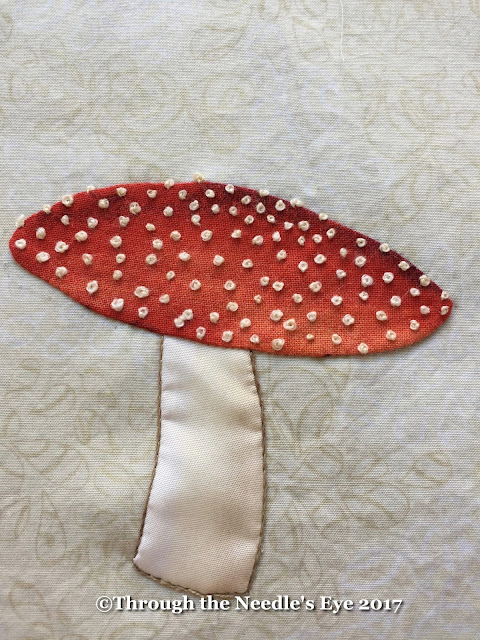 |
| So many knots! |
 |
| A little greenery using three rows of stem stitches |
 |
| The finished mushroom. |
Stitches and Threads used (cotton block)
Cream wool, The Gentle Art Simply Shaker Toasted Marshmallow for French knots on mushroom cap
Tan floss, 1 strand Weeks Driftwood for stem stitch around stem
Green #12 pearl, Valdani O560
Wool Block
On to the wool block we go! I really only had one choice of wool in my stash for the cap, so that made choosing a color easy. My freezer paper didn't make the move so I finally restored my supply, as it is my go-to method for cutting out wool appliqué patterns. I like to glue my pattern pieces to freezer paper, cut them out, and iron them onto my wool for cutting out the appliqué pieces. I could probably run the freezer paper through my printer but I save some paper this way as I can use scraps.
 |
| Ironed onto the wool. |
 |
| Pattern pieces ready to cut out. |
 |
| Cut out and ready to be placed on the background. |
The cream wool for the stem showed up a little better on the linen background, but I wanted it to give it a little more depth. A little shading, again with the pastel, did the trick.
 |
| Just a little color on the edge helps. |
Padding the cap with a little batting, cut slightly smaller than the wool, added some dimension.
 |
| I cut the batting the same size as the wool, and then trimmed it smaller. |
I stapled the pieces down and proceeded to sew around them using one strand of Weeks Parchment for the stem and one strand of Weeks Red Rocks for the cap. Matching sewing thread would work as well.
 |
| The stem sewn in place |
And once again it was knot time. For the knots on the wool, I decided to use floss instead of wool thread to add another texture, so I used two strands of the Weeks Parchment for knots. Again, I varied the size of each knot by tension and wraps; sometimes two wraps, sometimes three. As I finished each knot, I made sure not to yank too tightly as I brought my thread to the back, in order not to compress the batting with all those knots.
 |
| The finished wool block |
 |
Again, I used a light, tan thread (Weeks Driftwood)
around the stem to highlight it. |
Stitches and Threads used (wool block)
Tan floss, 1 strand Weeks Driftwood for stem stitch around stem
Cream floss, 2 strands Weeks Parchment for French knots on mushroom cap.
Green #12 pearl, Valdani O560
This block will definitely be one of my favorites since finding the mushrooms to take their picture was such a challenge. A friend of mine mentioned that I might be obsessing over a mushroom that isn't even edible, but it was worth the hunt. Hopefully, you will enjoy stitching this woodland gem that led me on such a chase. If you have made either of the two previous blocks we'd love to see pictures!


