Showing posts with label nest. Show all posts

Thursday, April 14, 2022

Nesting Nuthatch

We are thrilled to have had such a great response to our Blue Jar Medley offering, Nesting Nuthatch! If you have followed us for any length of time, you will know that birds of all kinds are near and dear to our hearts. I (Kara) particularly love the nuthatch, as it was one of my Grandmother's favorite birds.
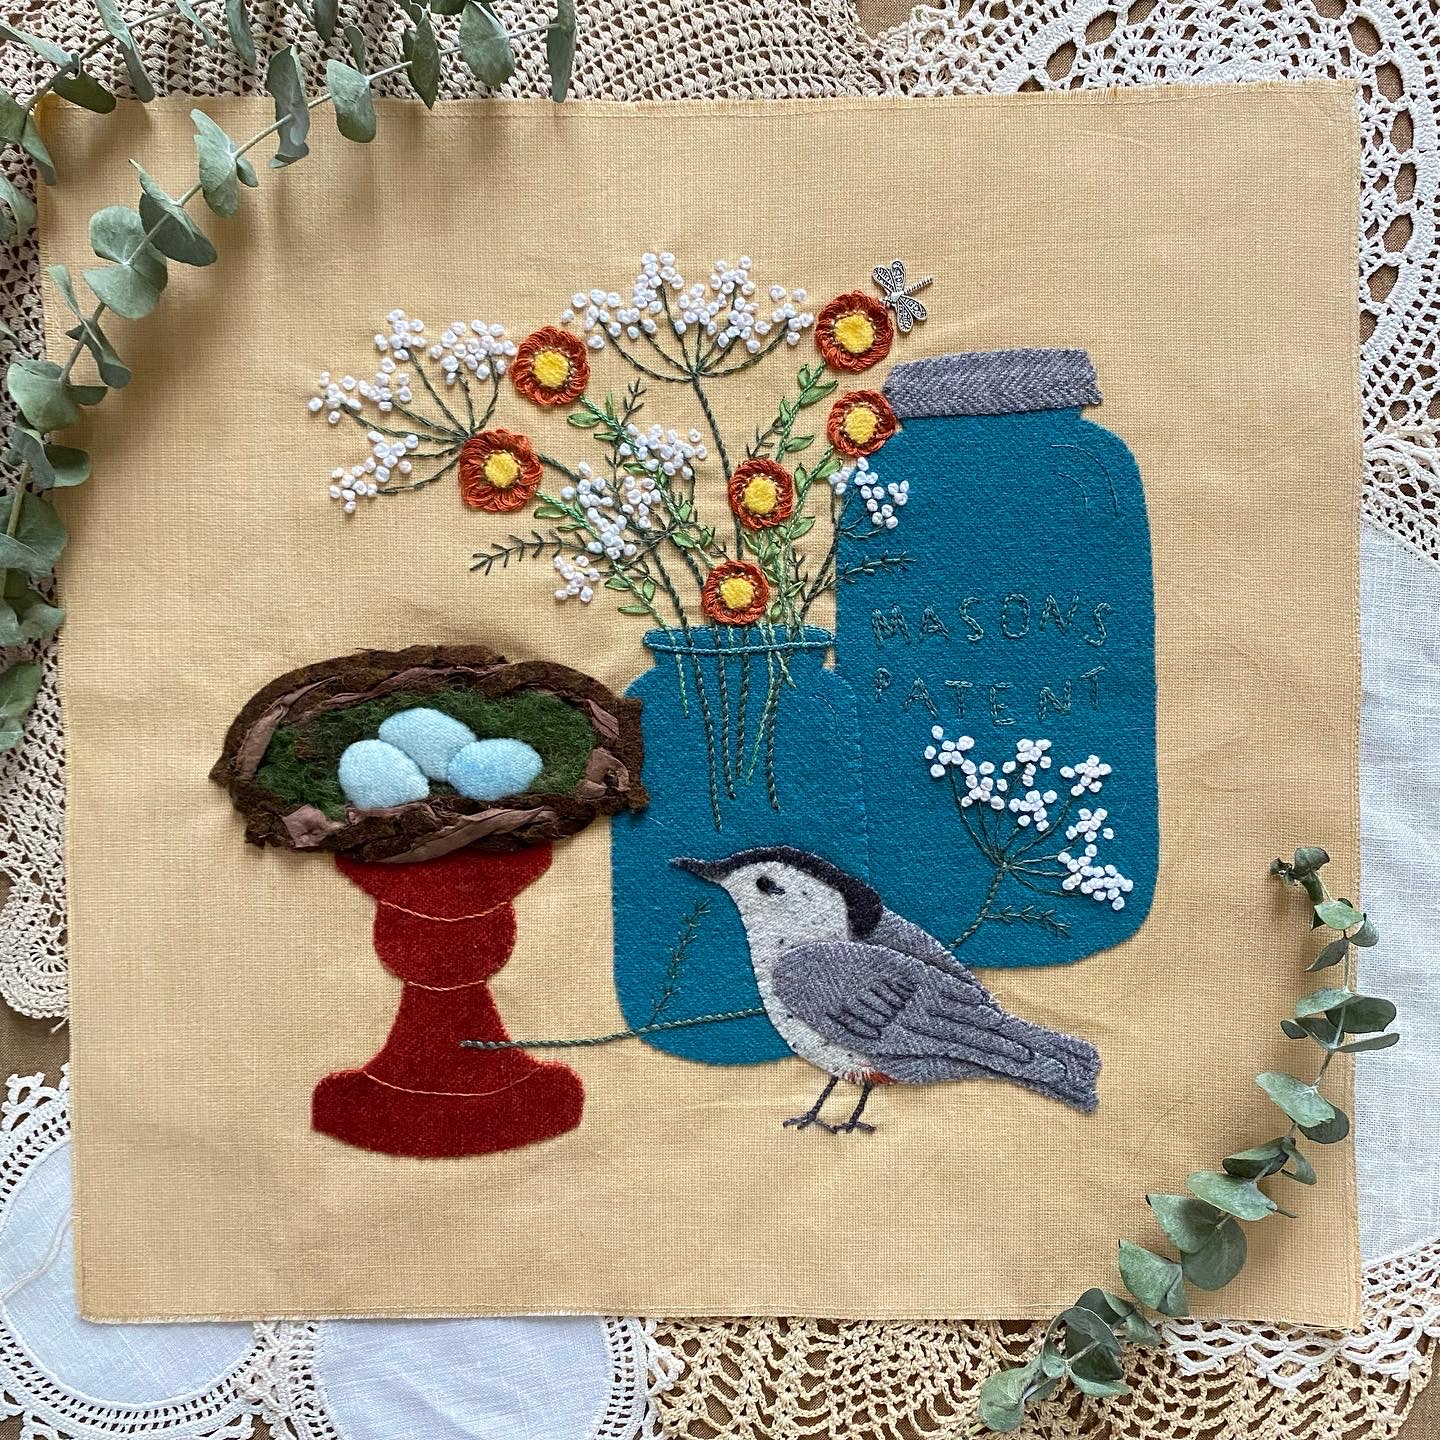

There are a few new techniques in this block—none of which are difficult, but we thought we would show some more detailed pictures for some of those techniques. Let's show you the nest according to your pattern directions. 

The Nest
In the nest directions #2:

Gather your two brown wool “noodles” and the piece of sari silk ribbon. Holding them all together, begin to coil them around on top of the pedestal, twisting and overlapping the strips. Pin in place loosely.

Nest materials

Gather your two brown wool noodles and your piece of sari silk.

Holding them all together, begin to coil them around
on the top of the pedestal.

Twisting and overlapping the strips.

Pin in place loosely.

Nest Directions #3:
Starting at the top of the nest, use brown thread and take tack stitches to secure the nest pieces and build your nest, arranging as you go. You may want to snip the pieces to help with arranging. Stitch the nest down to the bottom inch, and then stop, leaving the remainder of the nest pinned.


Nest Directions #4: 
Take the green roving and thinly spread it over the center of the nest, as pictured. Stitch into place with a few tack stitches. Note that the roving will only be in the center, and not out to the edges, to give the illusion of the inside of the nest.


Nest Directions #5: 
If you want to stuff your eggs, cut a couple of layers of batting scraps (we used a high loft poly batt) a bit smaller than the eggs. Layer the batting under the eggs, one at a time, beginning with the back egg. Appliqué in place, being sure the batting is beneath the egg. You may find it easier to use individual stab stitches around the eggs to help achieve the rounded egg shape.


Nest Directions #6: 
Finish the front of the nest, being sure to stitch a bit of the nest material over the bottom of the front two eggs.


The Straw Flowers
The straw flowers are made with a yellow wool center and a Pekinese stitch applied around that center.


If you would like to see some close-ups and an entire post about the Pekinese stitch, follow the links below:


We also have some close-up pictures of the ribbon stitch in a Facebook post linked below, as well as a link for a whipped chainstitch (Queen Ann'e lace stems) tutorial:


As hard as we try to make sure our patterns are complete, we are human and sometimes little things slip through our proofreading brains. Neither Teri nor I caught our lettering omission until now, so we have sent out an email to all those who have downloaded our pattern and have fixed the pattern for future downloads. If you didn't get the lettering addition, then you can download it below. We also are linking a post that we have written earlier on using Press and Seal.

Mason jar lettering: Updated template with lettering

Hopefully these pictures and links will help you as you stitch our sweet little nuthatch block. We loved making this block, and we can't wait to see the finished quilt with all the designers' blocks included!

Happy Stitching!


Thursday, March 30, 2017

Spring Wool "Egg"citement!

Well, at least in Maryland, spring seems to be determined to stay this time. Given typical Maryland weather, I (Kara) wouldn't bet my life on it, but my hope "springs" eternal. Winter always seems to hold on just a bit longer than we would like, but now the forsythia is beginning to come out (for the second time) and my hyacinths have deemed it safe to bloom. When I have had enough of winter but it is still sticking around, I like to put touches of spring inside the house—just to remind me that warmer weather and flowers will come eventually. That is why it seemed like a good time to come up with some new spring decorations. 


Our wool acorns last fall were so much fun, I thought I would adapt that process to make some wool eggs in happy, spring colors. I went through my wool stash and was able to find some scraps that would work perfectly. Once I picked the wool, it was time to choose the embroidery floss. I have really enjoyed working with Weeks Dye Works floss, so that was what I decided to use for this project.

The floss and wool colors are almost an "eggs"act match!


The first step was to cut out a pattern. I wanted to keep these eggs small so my egg shape was 7/8 of an inch at the widest part and 1.5" tall. 


Next, I traced my 3 egg pieces on the wool and then cut them out.


Using two strands of floss, I put two egg pieces together and starting from the bottom (the fatter part of the egg) I blanket stitched them together, stopping at the top.

The first two pieces ready to stitch
Blanket stitched from the bottom, stopping at the top

Two sides stitched together
When I got to the top, I added my third piece and blanket stitched to the bottom.


After the two sides were stitched, I added my embroidery embellishment using various stitches: stem, chevron, herringbone, lazy daisy and french knots. I started at one end and traveled across to the other. 

A few little straight stitches using two strands of floss
Herringbone and stem stitches

Once I was happy with the embellishment, I stitched the third side starting at the top and stopping about a 1/4 of an inch from the bottom center.

Stopping at this point leaves an opening just big enough for stuffing.
I unthreaded my needle at this point and put it aside, leaving the threads hanging. Then I used a toothpick to help me get the polyfill stuffing in the egg and I packed it pretty tightly.

This much stuffing actually fit into the egg.
Almost full, but needs a little bit more to round it out.

When the egg was full, I threaded my needle again and stitched the hole closed using a blanket stitch.

A finished egg!

As part of this project, I really wanted to create a nest using the sari silk that I used in the Secret Garden. My first attempt was to stitch the sari silk into a nest, but I quickly realized that sewing it was not going to work, mainly because I didn't have the patience for it. So I thought I would glue it together using some fabric glue and a pyrex dish as a mold. The glue I was using wasn't holding very well and it showed up on the outside. 

Attempt #2
Not loving the glue
Not what I was going for 

My next thought was to still use the pyrex cup as a mold, only this time use the inside. I soaked a length of sari silk in starch, layered it into the cup, and baked my nest for a couple of hours until it was dry. It worked to a certain degree, but the layers did not stick together very well. I think this process has potential, but I was tired of fussing with nests.

Starch soaked sari silk.

My nest before baking.

A loosely woven and somewhat crunchy nest.

The creative process has its ups and downs, and my nest-making efforts were mostly downs, but that is the way it works sometimes. I really wanted to have a nest for my eggs and remembered that I already had a pre-made nest from Michaels and decided it was just perfect!

My hyacinths provided a lovely photo backdrop for my nest full of eggs

Five tiny eggs all in a row


While my nest attempts didn't turn out, these eggs went together so quickly and turned out "eggs"actly as I had hoped. If you give them a try, let us know; we'd love to see your pictures! If you have any questions, feel free to ask them in the comments section. Hopefully, spring will come to your neck of the woods soon. If she hasn't, make up some of these little eggs to remind you that she is on her way.


P.S. If you haven't already, go over to our post, Happy Birthday to Us! and leave a comment there, telling us which of our posts over the past two years is your favorite—and why. You could win a Marcia's Flowers pattern in the color palette of your choice! The giveaway closes on Sunday, April 2, at midnight.

SaveSave