Showing posts with label leaves. Show all posts

Saturday, June 22, 2019

A Tardy Tutorial

Better late than never is not our normal life mantra, but sometimes that's just the way life is—especially when it comes to blog posts! Thankfully, there are no blog police out there and we can just roll with what the week brings and deliver a blog post a day (or two) later than we normally do.

We are working feverishly on quite a few projects for next year and as we do, we try to be diligent about taking pictures for our handouts. When we teach a class, we feel it is important to give our students all the information they might need to finish the project once they leave the class, thus all the pictures need to be taken for our handouts. This tutorial shows how I (Kara) have made the split leaves for one of our class projects. 


Split Leaf Tutorial

For this method I used a full leaf template, the convex side of a half leaf template and two different green fabrics. 


Step 1

Place the convex side of your leaf template on your first fabric.


Step 2

Trace the center vein line starting at the top making sure to trace the top and bottom curve of the leaf to help your placement later.


Step 3

Finger press along drawn line.


Step 4

Place on second green and pin.


Step 5

Appliqué the turned-under line between top and bottom marks. Turn over and trim the excess second fabric to 1/8 of an inch.


Step 6

Center full leaf template over appliquéd seam line and trace around with a marking pencil of your choice. I use a white uniball Signo rollerball pen which you can find HERE.

It helps if your leaf template has a drawn
center vein line, but I just eyeballed this leaf.

Drawn leaf

Step 7

Trim leaf leaving a generous 1/8".


Back side of leaf

Step 8

Place on background and pin or baste in place.


Step 9

Needle turn edges under!


There are a lot of ways to do split leaves for appliqué, but this method has worked well for me. As with many components of appliqué, it's always good to try multiple methods and find the one that works best for you. Hopefully, you will give this split leaf method a try.

In the not too distant future, we will be able to share the projects that we are working on in full. It's keeping us pretty busy, and Teri is also getting ready for an exciting, cross-country road trip. You can bet that her travels will include some fun quilty stops! 

Thanks for bearing with our tardiness in posting!

Thursday, May 12, 2016

Baltimore Album Questions and Observations

Today, I (Kara) am going to share the rest of our Baltimore Album block pictures from the Lovely Lane Museum trip. This trip was the first time that I had been in the presence of actual Baltimore Album Quilts that were not behind glass, so I was able to closely look at all the blocks. (Some of us even stood on chairs to get a closer look!) The beauty and intricacy of these quilts were awe-inspiring, yet they also raised a few questions. I thought I would use this post to share some observations and questions that arose from our trip.

One of the things that has always drawn me to Baltimore Album quilts is that they usually contain blocks with very vivid fabrics—unless they spent some time underwater, like the Reverend Best quilt did. So vivid, in fact, that it makes one marvel that these quilts are antiques.

I love the vivid blue and reds.

What a creative use of fabric for the vase

Simple shapes with eye-catching colors

A simpler basket variation with the bright colors 

Another observation is that the inking on these blocks is amazing. Beautiful handwriting is a lost art today (I include mine in that assessment), so to see the detail of the inking on these blocks up close was mind-blowing. Did they ink before or after they appliquéd the block? I know the hardest part of our fairy tale quilt for Teri was the inking, not the appliqué.

Such lovely handwriting

This artist even inked the sailors!

For me, one of the blocks stood out from all the rest: this lovely vase of flowers. The level of creativity the artist reached is truly inspirational. 

This block, from a distance, looks like a painting.

An inspired use of gradated fabric

This rose was done with a single piece of red fabric, but dimension
was added using embroidery and stitching.

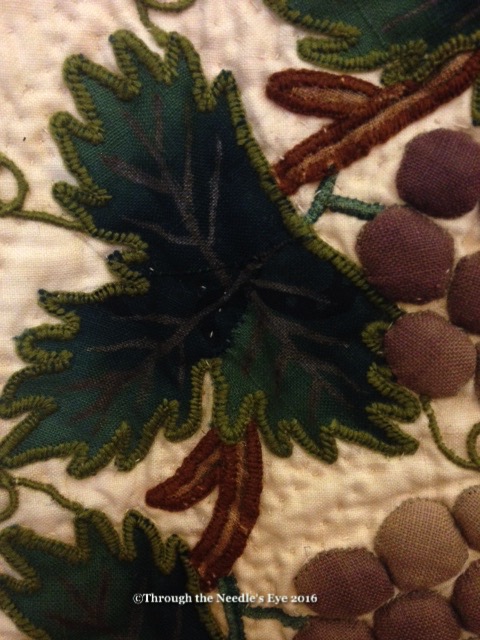
Some of the blocks prompted questions among us as we took a closer look. One block led to some debate as to how the artist created the leaf veins.

The whole block

The vines appear to be couched cording.

Were the veins painted on or part of the fabric?

This block prompted us to ask, "Are those jalapeños?"

What fruit are the shapes above the lemon?

While this block begged the question, "Is that a basket handle or a really large caterpillar?"


Did she really stuff all the channels with cord and stuffing? How long did this quilt take to complete?
Who comes up with something this detailed?

All the quilting was done with a backstitch on this quilt.

Great attention to detail was put into so many of these blocks, and I hope to put that same level into my future blocks. It was such a privilege to be able to examine these quilts so closely and to learn from them. We hope we have brought you with us on our visit to the Lovely Lane Museum, and that you have been as inspired by these amazing Baltimore Album quilts as we were.