Showing posts with label wool. Show all posts

Wednesday, November 23, 2022

"Gnome-shave" November (or How to Attach a Beard)

Instead of "No-shave November," over here it is "Gnome-shave November," as our gentleman gnome has a fun and curly beard! We have used curly wool to give some great texture to our gnome's beard, and the curly wool is available as part of the embellishments in our wool kit. While it might look complicated, we have broken the process down for you in a series of pictures.


Use just a small amount of curly wool—it doesn't take much.


Roll it around in your hands until you have a small, slightly compacted ball of wool. 


Pull apart the ball of wool to fit your beard shape.


Stick a few pins in the wool, then thread your needle with matching thread and start stitching at the top of the beard. 


With small tack stitches, couch the wool down working your way around the face.


Down one side of the beard...


...until you get back to where you started.
Your beard will look very fluffy and somewhat out of control. 


In order to tame that beard, take small tack stitches within the beard to tidy up the fluff. As you are taking those stitches, you can tack down any stray fibers and bring them under control. You will use a lot of tack stitches.

So that is how we attached the wool for our gentleman gnome's beard. If you don't have curly wool, wool roving would work, or just use the plain cream wool and add some stitching within it with wool thread.

Have fun with it!


Monday, July 11, 2022

Flora and Fauna


Almost 5 years ago, we started a project called Flora and Fauna of Germany. I (Kara) can't believe it has been that long! We began the project as a way to use up our scraps of wool and cotton with simple blocks inspired by the flora and fauna I would see on my walks in Germany with our two hounds. We released 16 blocks over the course of the next two years—one in cotton and one in wool—and loved being able to have the opportunity to bring nature to life with interesting threads, fabrics, and stitches. Once the project was finished, I put together the cotton blocks in a quilt with inked labels and hand-quilted it.
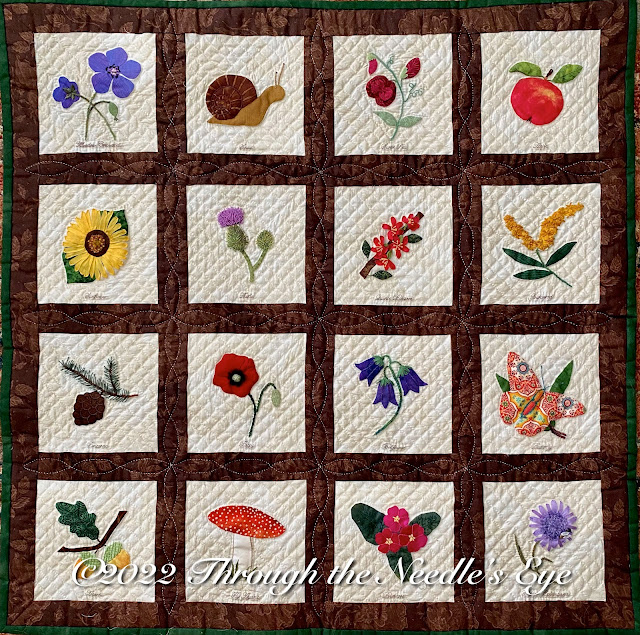
Meanwhile, the wool blocks were sitting on a shelf waiting to be assembled. A thought occurred to us that maybe we could add more blocks to create a larger quilt, and that is how our most recent pattern came about. 


Flora and Fauna is a 30-block quilt, made up of the original 16 blocks and 14 brand new blocks. We have also added an apple blossom border to finish the quilt. Whether it is a butterfly or a bloom, you will be able to stitch all sorts of things found in the forest or on a garden path. 

The pattern contains directions and templates for all thirty 6-inch (finished) blocks and the borders, as well as assembly directions. Embroidery directions and suggestions for thread selection are also included. This project is a perfect way to use up some of those small scraps of wool that we always save, as well as a way to try out some of those beautiful threads that we purchased just because they were pretty. The blocks can be put together quickly and before you know it you will have a lovely quilt.


Since it has been a while since we have had a Hopeful Stitchers project, we knew that Flora and Fauna would be just the thing for our Facebook group. The members of our Hopeful Stitchers group will be able to download the selected 5 patterns for free and have exclusive access to the discounted full pattern.

Each Monday and Thursday for the next two weeks, we will offer one or two of the blocks digitally as a free pattern—only in our Hopeful Stitchers Facebook group. The pattern for the full quilt will be available for purchase on Thursday, July 21, in our web store. Group members will have access to a special discounted price for 2 days only: Thursday, July 21 and Friday July 22. What a deal—30 patterns plus assembly instructions, all for about a dollar a pattern or less! If you are a member of our Hopeful Stitchers group, you will receive five patterns free. (You must join the Facebook group to get the free patterns and the coupon code for the reduced price.)

The first free pattern is the Wild Strawberry Block


This block is brought to life with just a few simple stitches and a little bit of ribbon. The PDF of the pattern will be over in the Facebook group. If you haven't joined our Hopeful Stitchers Facebook group, you can do so by clicking on the link below. (Blocks will finish at 6")

We hope you love this quilt as much as we do, and as always, please post your progress on our Facebook group page as you complete these little wooly blocks inspired by the great outdoors!


Thursday, April 14, 2022

Nesting Nuthatch

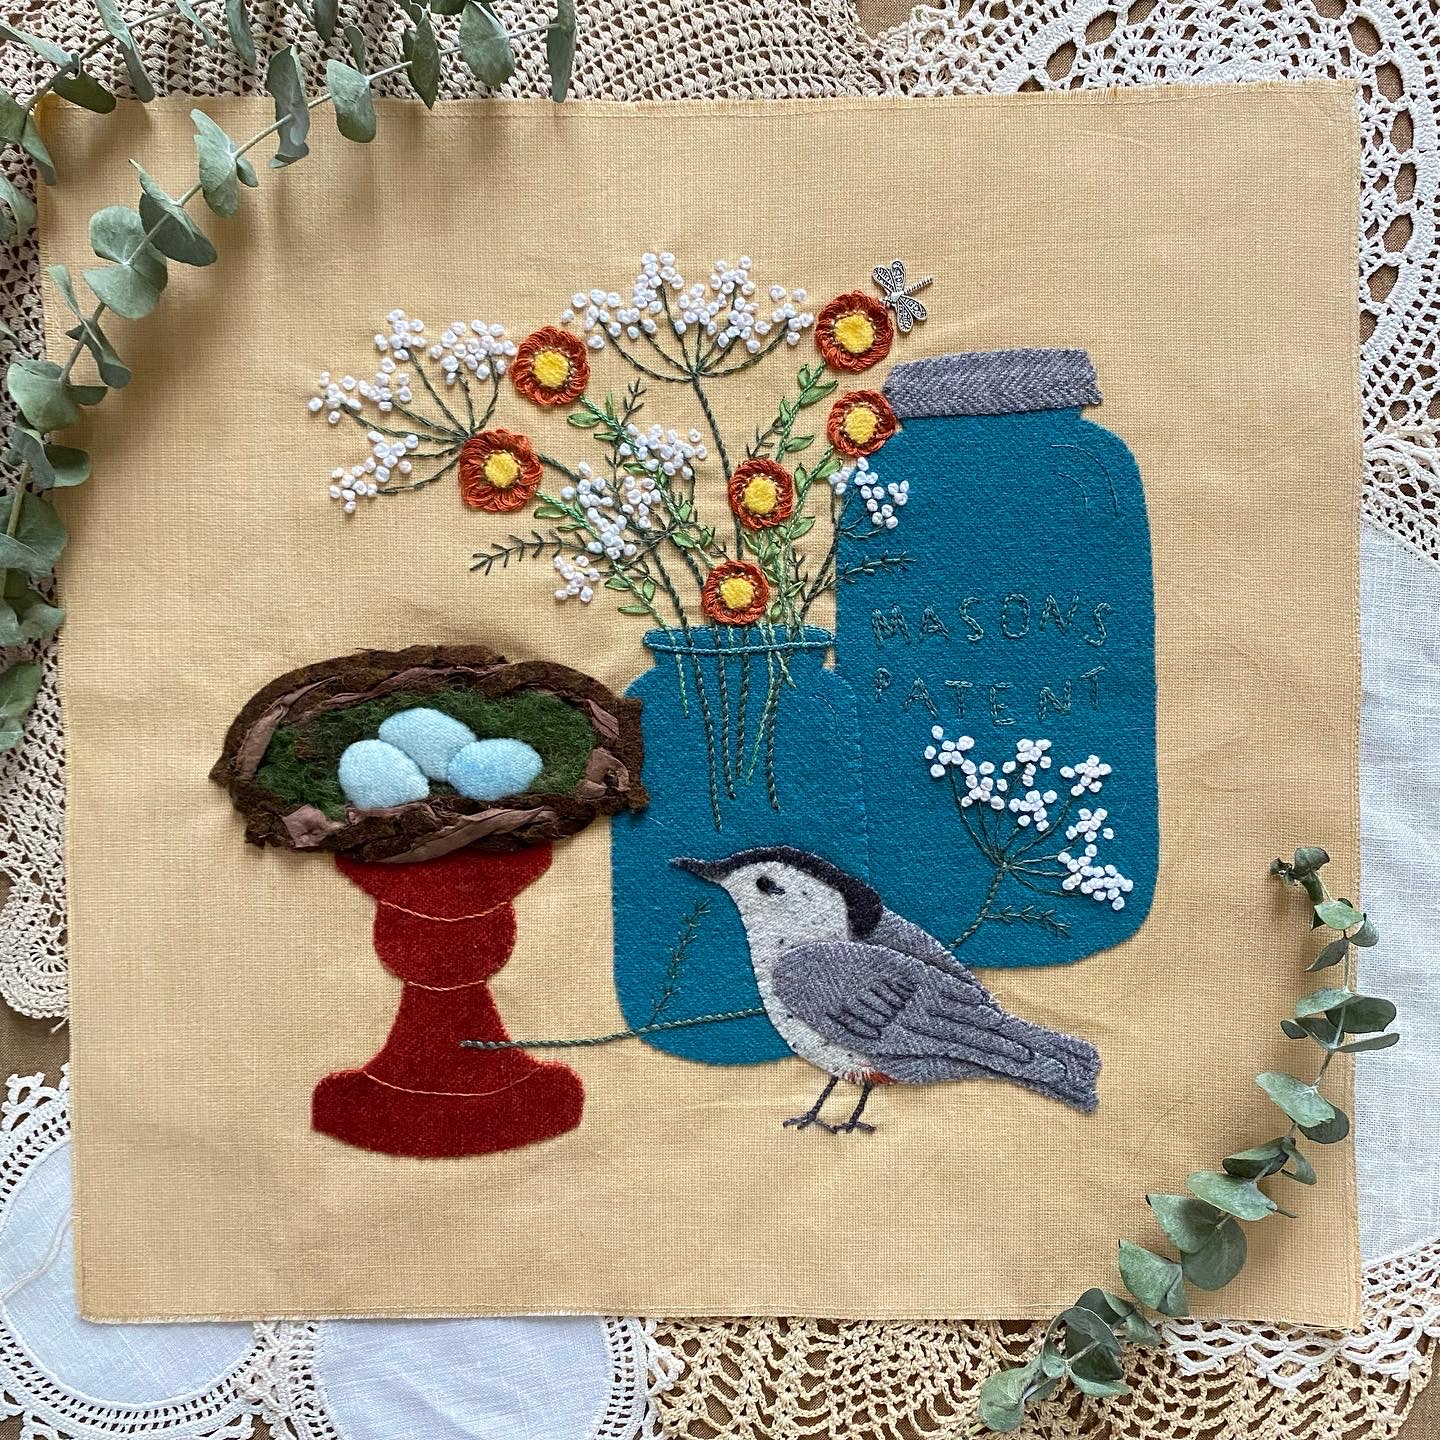
We are thrilled to have had such a great response to our Blue Jar Medley offering, Nesting Nuthatch! If you have followed us for any length of time, you will know that birds of all kinds are near and dear to our hearts. I (Kara) particularly love the nuthatch, as it was one of my Grandmother's favorite birds.


There are a few new techniques in this block—none of which are difficult, but we thought we would show some more detailed pictures for some of those techniques. Let's show you the nest according to your pattern directions. 

The Nest
In the nest directions #2:

Gather your two brown wool “noodles” and the piece of sari silk ribbon. Holding them all together, begin to coil them around on top of the pedestal, twisting and overlapping the strips. Pin in place loosely.

Nest materials

Gather your two brown wool noodles and your piece of sari silk.

Holding them all together, begin to coil them around
on the top of the pedestal.

Twisting and overlapping the strips.

Pin in place loosely.

Nest Directions #3:
Starting at the top of the nest, use brown thread and take tack stitches to secure the nest pieces and build your nest, arranging as you go. You may want to snip the pieces to help with arranging. Stitch the nest down to the bottom inch, and then stop, leaving the remainder of the nest pinned.


Nest Directions #4: 
Take the green roving and thinly spread it over the center of the nest, as pictured. Stitch into place with a few tack stitches. Note that the roving will only be in the center, and not out to the edges, to give the illusion of the inside of the nest.


Nest Directions #5: 
If you want to stuff your eggs, cut a couple of layers of batting scraps (we used a high loft poly batt) a bit smaller than the eggs. Layer the batting under the eggs, one at a time, beginning with the back egg. Appliqué in place, being sure the batting is beneath the egg. You may find it easier to use individual stab stitches around the eggs to help achieve the rounded egg shape.


Nest Directions #6: 
Finish the front of the nest, being sure to stitch a bit of the nest material over the bottom of the front two eggs.


The Straw Flowers
The straw flowers are made with a yellow wool center and a Pekinese stitch applied around that center.


If you would like to see some close-ups and an entire post about the Pekinese stitch, follow the links below:


We also have some close-up pictures of the ribbon stitch in a Facebook post linked below, as well as a link for a whipped chainstitch (Queen Ann'e lace stems) tutorial:


As hard as we try to make sure our patterns are complete, we are human and sometimes little things slip through our proofreading brains. Neither Teri nor I caught our lettering omission until now, so we have sent out an email to all those who have downloaded our pattern and have fixed the pattern for future downloads. If you didn't get the lettering addition, then you can download it below. We also are linking a post that we have written earlier on using Press and Seal.

Mason jar lettering: Updated template with lettering

Hopefully these pictures and links will help you as you stitch our sweet little nuthatch block. We loved making this block, and we can't wait to see the finished quilt with all the designers' blocks included!

Happy Stitching!


Thursday, January 20, 2022

Blue Jar Medley Mystery Stitch-Along

We are happy to announce the  Blue Jar Medley Mystery Stitch-A-Long.  

Mark your calendars and tell your friends about this FREE event: you don’t want to miss it! Beginning January 31, 2022, and each Monday following, one participating designer will  feature their “Blue Jar” with a FREE downloadable pattern available during each designer's  spotlight week! After each spotlight week, digital patterns will be $5.00 for the remainder of the program. Complete the project with a Finishing Pattern available FREE, April 25th-May 2nd 2022. Fabric kits, threads, printed patterns, and more will be available to help make a beautiful quilt! Kits will include wool, fabric, and embellishments. Follow the schedule below and visit each individual designer's website/social media to order or download the free pattern...for a limited time!

Preorders are being accepted now! 

  • Jan 31 - Feb 4 Calico Patch
  • Feb 7- 11 The Woolen Needle
  • Feb 14 - 18 Red Button Quilt Company
  • Feb 21 - 25 Linen Closet Designs
  • Feb 28 - Mar 4 My Red Door Designs
  • Mar 7- 11 Blueberry Backroads
  • Mar 14-18 Sew Cherished
  • Mar 21 - 25 The Cottage Rose
  • Mar 28 - Apr 1 Traditional Primitives
  • Apr 4 - 8 Yellow Creek
  • Apr 11 - 15 Through the Needle's Eye
  • Apr 18 - 22 Rusty Crow
  • April 25-May 2 Calico Patch: Finishing
Remember that it will be a tad different this round: the digital pattern will be free for the designer's spotlight week only, and then revert to the low price of $5, and all printed patterns will be only $6 for the duration of the stitch-along. So follow along, and tell your friends about it, so you call all join in from the beginning. This will be a fun one, for sure!

For more information and links to each designer's website, click HERE. And if you haven't yet joined our Woolie Friends Facebook page, hop on over and join us!


Thursday, September 16, 2021

A Prairie Posting

Last week, Teri and I (Kara) experienced Baltimore on the Prairie for the first time, and we were hooked. From the moment we walked in the door of Lied Lodge, we knew that it was going to be a great week.

This is the view that greeted us!

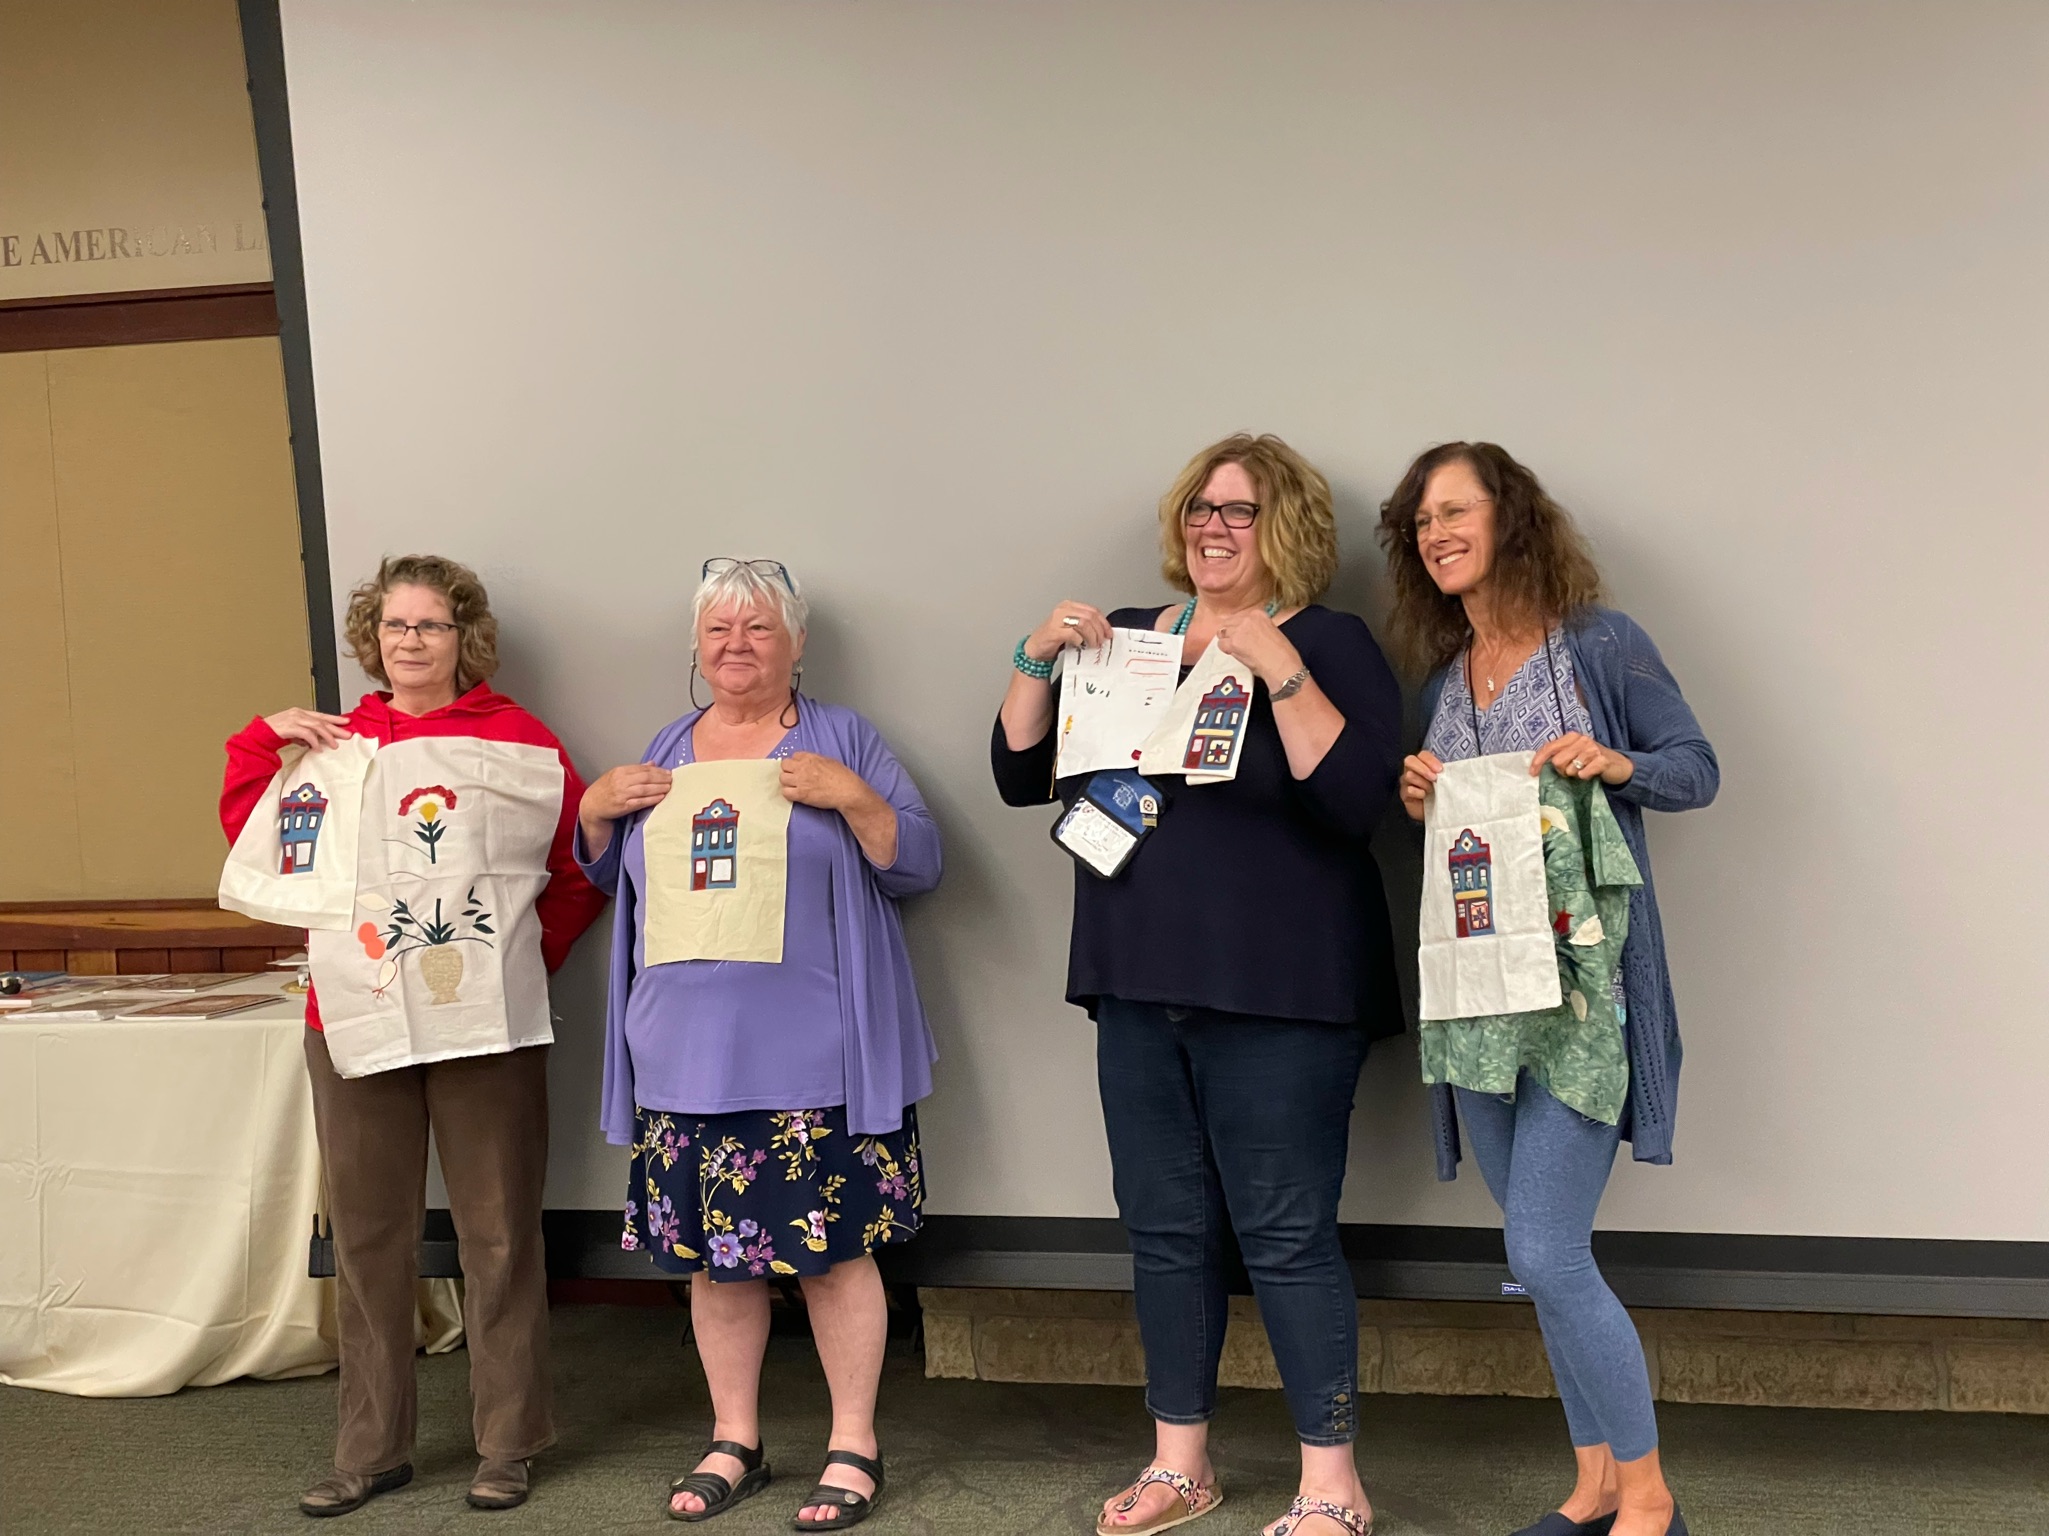
We taught two classes, Alsatian Urn and Village Wanderings–Shops. Both classes were filled with the best students, and we had a wonderful time full of stitching and laughter—what more could you ask for?! Here are a few pics from our fun-filled week.

Our store ready to go.

Village Wanderings and Alsatian Urn on the right and Baltimore Fraktur on the left.

Pretty soon this will be off to the quilter after another class
in Charlottesville, VA.

Our diligent Alsatian Urn students

Teri giving a lesson on the familial relationship of the chain, feather, and 
fly stitches.

The second session had our students working a bit in miniature.

Building a shop.

Quilt making

Tweezers were helpful in assembly.

How many times can you say you built a shop and
made a quilt in just one day?

One of our students quilted her 1" quilt.

Showing off their baby quilts.

Last night show and tell.

If you have never been to Baltimore on the Prairie, we highly recommend it! The setting is beautiful, the class sizes are not too big, and the people are some of the friendliest you will ever meet. Tresa Jones and her phenomenal support staff anticipate every need and are constantly checking to make sure everything is just so. If you would like to join us for 2022, registration is open now for our two classes—Woodland Reverie in Wool, and Baltimore Fraktur.

Woodland Reverie in Wool

Baltimore Fraktur Quilt

Baltimore Fraktur Wallhanging

These two classes will take wool appliqué to a whole new level with lavish embellishment and a large variety of unique fibers that will bring these projects to life. Our Woodland Reverie in Wool quilt uses wool roving, velvet, and silk ribbon (just to name a few) to create four whimsical and dimensional blocks. Our Baltimore Fraktur Quilt and Wallhanging will give you options to create multiple projects with one pattern even though we will be focusing mostly on the medallion in class.

We would love to see you next year on the Prairie but sign up soon as classes will fill quickly!


P.S. Teri and I are still away until September 20th, so we ask for you patience in our slower response times with orders and questions.