Showing posts with label emboidery. Show all posts

Thursday, April 14, 2022

Nesting Nuthatch

We are thrilled to have had such a great response to our Blue Jar Medley offering, Nesting Nuthatch! If you have followed us for any length of time, you will know that birds of all kinds are near and dear to our hearts. I (Kara) particularly love the nuthatch, as it was one of my Grandmother's favorite birds.
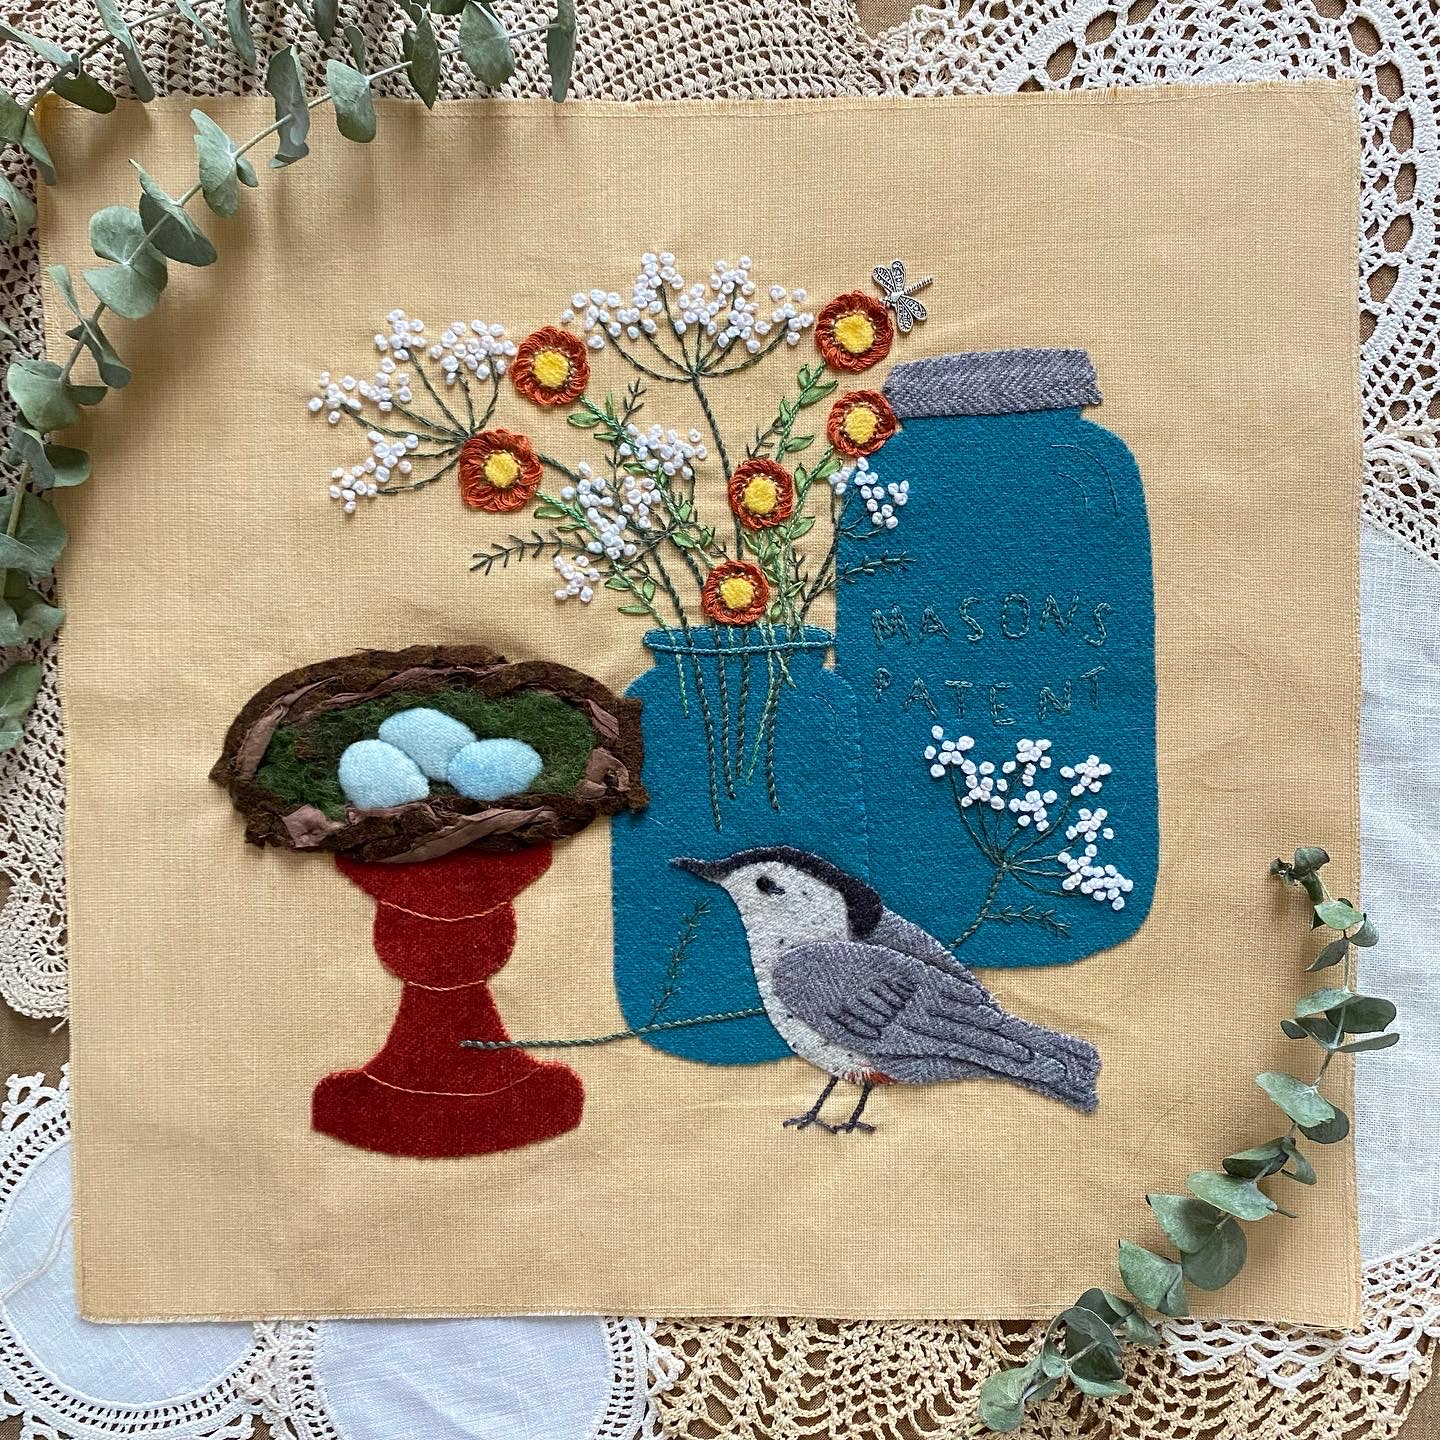

There are a few new techniques in this block—none of which are difficult, but we thought we would show some more detailed pictures for some of those techniques. Let's show you the nest according to your pattern directions. 

The Nest
In the nest directions #2:

Gather your two brown wool “noodles” and the piece of sari silk ribbon. Holding them all together, begin to coil them around on top of the pedestal, twisting and overlapping the strips. Pin in place loosely.

Nest materials

Gather your two brown wool noodles and your piece of sari silk.

Holding them all together, begin to coil them around
on the top of the pedestal.

Twisting and overlapping the strips.

Pin in place loosely.

Nest Directions #3:
Starting at the top of the nest, use brown thread and take tack stitches to secure the nest pieces and build your nest, arranging as you go. You may want to snip the pieces to help with arranging. Stitch the nest down to the bottom inch, and then stop, leaving the remainder of the nest pinned.


Nest Directions #4: 
Take the green roving and thinly spread it over the center of the nest, as pictured. Stitch into place with a few tack stitches. Note that the roving will only be in the center, and not out to the edges, to give the illusion of the inside of the nest.


Nest Directions #5: 
If you want to stuff your eggs, cut a couple of layers of batting scraps (we used a high loft poly batt) a bit smaller than the eggs. Layer the batting under the eggs, one at a time, beginning with the back egg. Appliqué in place, being sure the batting is beneath the egg. You may find it easier to use individual stab stitches around the eggs to help achieve the rounded egg shape.


Nest Directions #6: 
Finish the front of the nest, being sure to stitch a bit of the nest material over the bottom of the front two eggs.


The Straw Flowers
The straw flowers are made with a yellow wool center and a Pekinese stitch applied around that center.


If you would like to see some close-ups and an entire post about the Pekinese stitch, follow the links below:


We also have some close-up pictures of the ribbon stitch in a Facebook post linked below, as well as a link for a whipped chainstitch (Queen Ann'e lace stems) tutorial:


As hard as we try to make sure our patterns are complete, we are human and sometimes little things slip through our proofreading brains. Neither Teri nor I caught our lettering omission until now, so we have sent out an email to all those who have downloaded our pattern and have fixed the pattern for future downloads. If you didn't get the lettering addition, then you can download it below. We also are linking a post that we have written earlier on using Press and Seal.

Mason jar lettering: Updated template with lettering

Hopefully these pictures and links will help you as you stitch our sweet little nuthatch block. We loved making this block, and we can't wait to see the finished quilt with all the designers' blocks included!

Happy Stitching!


Friday, July 13, 2018

But wait; there's more!! (NE Inspiration)

What would a road trip be without a quilt shop or two? I (Teri) did stop and visit a couple, and then we made a special trip to a quilt shop that might be familiar to you. I knew of it because I've received their catalogs for decades. But we will visit that shop later in the post.
Without further ado, I hope you enjoy the rest of my New England inspiration.

Norton House–A Quilter's Paradise, housed in a building nearly 260 years old, is in Wilmington, Vermont, east of the the Green Mountains. How cool to shop for fabric in such an historic building, filled with centuries of stories.

The New Hampshire Law Enforcement Officers Memorial on the grounds of the Legislative Office Building in Concord, the state capital. It was difficult to capture the entire design without a helicopter; I can only imagine how impressive it is from an aerial view. It is shaped like a star, with the red, white, and blue flowers filling in the spaces between the star points. Stunning.

Lobster is everywhere in Bar Harbor, Maine. Wouldn't this notecard be a wonderful basis for an embroidered design?

Fabricate is a charming quilt shop in Bar Harbor. They also have scrapbooking supplies, and a room of yarn, as well. And it's housed in such a uniquely shaped building!

We saw this door on the side of an old church in Bethlehem, New Hampshire. I love the wood, the handle, the hinges—such character! What is it about old doors? They certainly pull you in... 😉

My wonderful husband drove over an hour to take me to Keepsake Quilting. It was just too close not to go and see this shop in person! The catalogs are jammed with quilt goodness, and the store did not disappoint.

What a greeting as I entered the front door! So bright and cheery.

I found rows and rows and rows of fabric in room after room...

...with notions sprinkled throughout the store, ...

...and patterns and precuts galore.


The spacious, inviting porch has plenty of seating for patiently waiting husbands. Mine found some freshly baked cookies at the neighboring grocery store to tide him over while he waited.

My package was tied with a beautiful bow—of fabric, of course!

I thought it was special that they tied my bag with a fabric bow, but look how nicely they folded my fabric to put it in the bag. Such presentation! If you ever are driving through New Hampshire, Keepsake Quilting is a must-stop. Everyone there was friendly and helpful, and the shop is oh, so inviting! It certainly lives up to its catalog.


One of our lunch stops had tables painted with lovely, quilt-like designs. I could easily visualize them appliquéd and/or embroidered.


This is just screaming to be stitched! Can you hear it, too?

But then there was this lovely sign, hanging on the wall right next to the table where we ate dinner one night. What? Really?! THAT is hardly inspiring. Well, maybe it inspires me to cook some lighter meals now that we're home! No more lobster rolls and blueberry pie.


By the way, have you checked out the rest of our vacation inspiration? Kara's Spain trip, Inspirational Quest (Vacation), and part one of my NE trip, New England Inspiration, are chock full of color and beauty. And don't forget to leave a comment on yesterday's post with your six-word story of the bees and fuchsia! I just happened to finish this busy little bee the day before we left for our vacation, but more about him to come in the very near future. 
I got a tiny bit of stitching accomplished on this trip, but I found so many things to spark my creativity. I'm home and ready to stitch!

How about you? Have you found inspiring sights during any of your summer travels? Please share!

Thursday, May 31, 2018

Progress In the Garden


I (Teri) love to spend time in my garden, or in any garden, for that matter! My garden is much different in our new home, but one thing remains constant: I have portulacas planted along my sidewalk—a long-standing tradition as a tribute to my great-grandparents' garden. (See A Walk Through the Garden.) We have had a rather odd spring this year, with warm temperatures late in arriving and such a plethora of rain that sunshine is sparse. But my hostas and coneflowers are huge and already sporting flower buds, so they must be happy. And when my garden is happy, I'm happy!    
        

Kara and are are always looking to gardens for inspiration for our stitching, as I'm sure you've noticed if you have been following our two block-of-the month series. Our In the Garden series is really coming along! Have you been stitching along with us? We know quite a few who have ordered each pattern, and are likely wondering what we have planned for them. Well, the time has come for us to start assembling them into a quilt! We have only two blocks left to complete (four more to release), but we thought you might enjoy seeing the progress thus far. And it is never to late to jump on board the garden wagon!!


Let's take a peek at the quilt progress. The captions include links to the original post with more about the blocks. It has been such fun seeing the blocks go together. I can hardly wait until it is finished!

A mix of seasons! This section of the quilt includes the next two patterns to be released:
 Hydrangeas in June and the Butterfly Bush in July.


Such a colorful garden!

"in the Garden"—Hummingbird and Fuchsia


I'm getting so excited to finish putting it all together; but alas, I have to take a short break—to work on our new designs for the Academy of Appliqué . . . so many fun things to do. We have such a "hard" job!! I wouldn't trade it for the world!

So, here is our quilt top at this point, with floor shining through where the two missing blocks will go. One is made and en route from Germany, and the other is still in progress. It won't be long now!


We would so enjoy it if you would join us In the Garden! Patterns are for sale on our website (www.needleseyestories.com) and are available in digital format as well as in hard copy, which includes the ribbon needed to complete the block. Oh, and fear not, we do plan to create a quilt pattern, with directions for assembling the quilt from all your blocks. Of course, you may wish to create smaller projects from your blocks, which is another garden path you can take.

Hope to see you In the Garden!