Showing posts with label bird. Show all posts

Thursday, April 14, 2022

Nesting Nuthatch

We are thrilled to have had such a great response to our Blue Jar Medley offering, Nesting Nuthatch! If you have followed us for any length of time, you will know that birds of all kinds are near and dear to our hearts. I (Kara) particularly love the nuthatch, as it was one of my Grandmother's favorite birds.
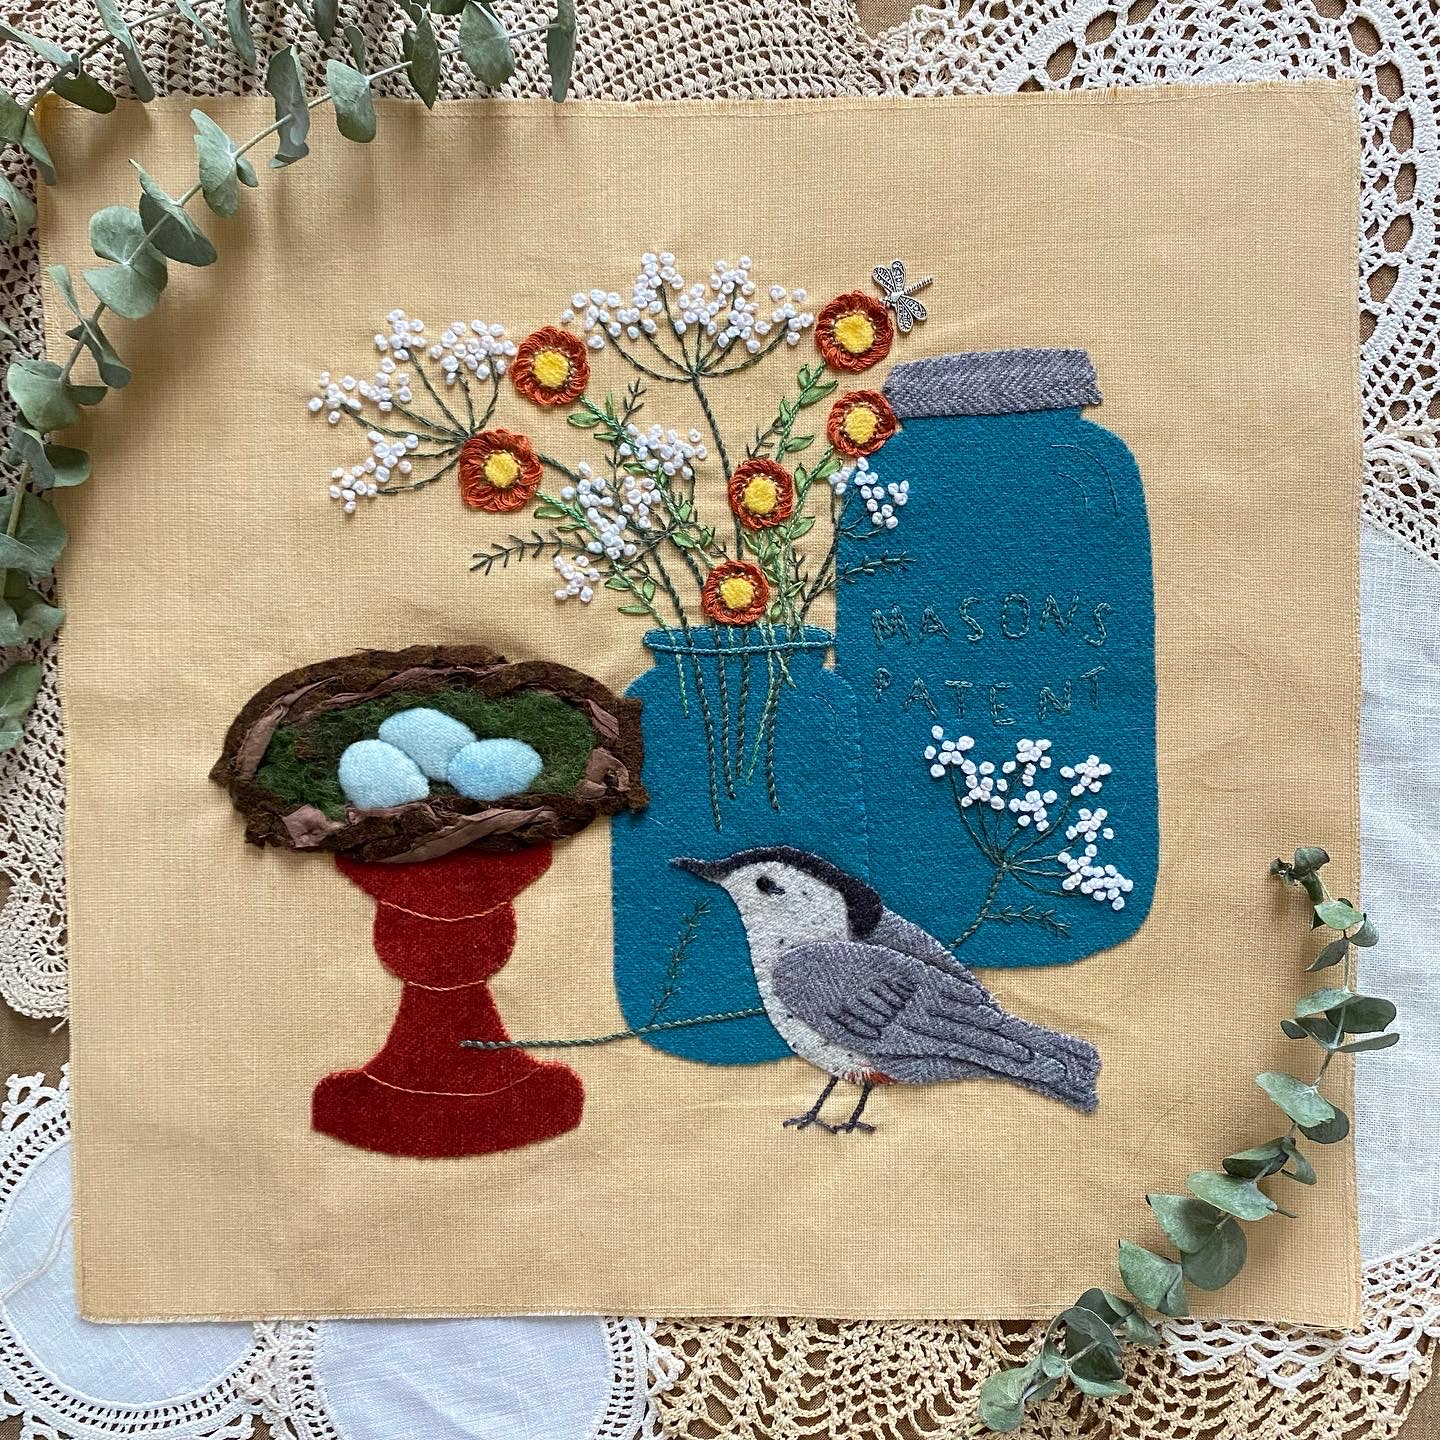

There are a few new techniques in this block—none of which are difficult, but we thought we would show some more detailed pictures for some of those techniques. Let's show you the nest according to your pattern directions. 

The Nest
In the nest directions #2:

Gather your two brown wool “noodles” and the piece of sari silk ribbon. Holding them all together, begin to coil them around on top of the pedestal, twisting and overlapping the strips. Pin in place loosely.

Nest materials

Gather your two brown wool noodles and your piece of sari silk.

Holding them all together, begin to coil them around
on the top of the pedestal.

Twisting and overlapping the strips.

Pin in place loosely.

Nest Directions #3:
Starting at the top of the nest, use brown thread and take tack stitches to secure the nest pieces and build your nest, arranging as you go. You may want to snip the pieces to help with arranging. Stitch the nest down to the bottom inch, and then stop, leaving the remainder of the nest pinned.


Nest Directions #4: 
Take the green roving and thinly spread it over the center of the nest, as pictured. Stitch into place with a few tack stitches. Note that the roving will only be in the center, and not out to the edges, to give the illusion of the inside of the nest.


Nest Directions #5: 
If you want to stuff your eggs, cut a couple of layers of batting scraps (we used a high loft poly batt) a bit smaller than the eggs. Layer the batting under the eggs, one at a time, beginning with the back egg. Appliqué in place, being sure the batting is beneath the egg. You may find it easier to use individual stab stitches around the eggs to help achieve the rounded egg shape.


Nest Directions #6: 
Finish the front of the nest, being sure to stitch a bit of the nest material over the bottom of the front two eggs.


The Straw Flowers
The straw flowers are made with a yellow wool center and a Pekinese stitch applied around that center.


If you would like to see some close-ups and an entire post about the Pekinese stitch, follow the links below:


We also have some close-up pictures of the ribbon stitch in a Facebook post linked below, as well as a link for a whipped chainstitch (Queen Ann'e lace stems) tutorial:


As hard as we try to make sure our patterns are complete, we are human and sometimes little things slip through our proofreading brains. Neither Teri nor I caught our lettering omission until now, so we have sent out an email to all those who have downloaded our pattern and have fixed the pattern for future downloads. If you didn't get the lettering addition, then you can download it below. We also are linking a post that we have written earlier on using Press and Seal.

Mason jar lettering: Updated template with lettering

Hopefully these pictures and links will help you as you stitch our sweet little nuthatch block. We loved making this block, and we can't wait to see the finished quilt with all the designers' blocks included!

Happy Stitching!


Thursday, February 21, 2019

An Inspirational Walk Through Liechtenstein

At this time of year, for Teri and me (Kara), our dining tables have disappeared under copious amounts of threads and ribbon as we put together kits for the Academy of Appliqué


While Teri is diligently working on kits, I had to get my end of things finished a week earlier, as my husband and I would be heading to Bavaria for a work conference this week. Needless to say, putting a blog post together for either of us was going to be a challenge. With that said though, I thought why not bring our readers along, through pictures, on our trip to the Alps—specifically Liechtenstein!

Our daughter flew in to join us on the front end of the trip. She lives in Bangladesh, so it was a long flight and a very drastic change in climate for her. One of the things we wanted to do while she was with us was to visit Liechtenstein. Kaitlin had participated in Model UN in high school, and the country she represented was Liechtenstein. It had always been a dream of hers to visit, so off we went. 

We chose to go to the capital, Vaduz, to take a hike, view the castle, and see the state museum. All three things on our agenda did not disappoint, and hopefully you will enjoy our trip as well!

A view through one of the castle gates

The Prince of Liechtenstein and his family still live in the castle, so we could just view it from a distance.

A storybook view!

A beautiful stone carving along the trail!

It was 50 degrees on our hike, and these snowdrops were a glimpse of the coming of spring.

After our hike, we went to the Liechtenstein National Museum. Unfortunately, we arrived there with just an hour to go through the museum, but we made the most of it. It was definitely worthy of a trip back. I love being inspired by other cultures!

A beautiful national hat

Another hat with some fantastic embroidery!

A decorative handbag.

Crocheted lace collars

This wonderful example of filet crochet has many Liechtenstein symbols and crests.

Close-up

A stunning tapestry depicting the life of Christ

Close-up

A collection of religious jewelry

Not quite a quilt, but this certainly qualifies as appliqué!

A close-up of the coat of arms

I fell in love with these wooden hearts used to decorate the cows
as they come down from the mountains.

The "IHS" is in thanksgiving to He who has preserved the cows and kept them during this time.
They are called Apabfahrtsherz.

A block used for fabric printing

Last but not least, a beautifully preserved Kingfisher. I think this may be the next bird we stitch!

We hope you were inspired by our quick trip to the little country of Liechtenstein. While it may be small, it is big on beauty and inspiration! 


Thursday, October 18, 2018

"In the Garden"—Wheelbarrow of Flowers

Well, we have made it to the final block in our In the Garden Block of the Month Series! Our final block is a wheelbarrow full of flowers. Several years ago, I (Teri) had an old rusted wheelbarrow that I used as a planter to hide an ugly corner of our home's foundation. That year, I planted it with coleus and sweet potato vines. But this wheelbarrow was to be filled with a variety of favorite flowers we had not yet stitched.

My garden wheelbarrow
We had such a fun time in our class this past weekend at Primitive Homespuns Wool & Needleworks, that I didn't pause to take a single photo! The afternoon was over so quickly that we were all surprised when it was time to pack and head home to stitch. Here are a few highlights of the block.

The wool pieces for the wheelbarrow and birdhouse are appliquéd in place using a matching thread. Because the weave of the wool that I used for the roof of the birdhouse was pretty loose, I used a buttonhole stitch to give it a cleaner look. A piece of dark wool was placed behind the hole in the house to give the illusion of going inside.

I stitched the spokes of the wheel using a dark pearl cotton—three lines intersecting at the center, dividing the wheel into six sections. I searched my button stash the hub of the wheel, but you could just appliqué a circle of wool there. (Or you could embroider a circle with a fun circular stitch!)

  
I had appliquéd a piece of plaid green wool to the top of the wheelbarrow to serve as a background for the flowers. I knew I wanted to stitch black-eyed Susans. I've been a Marylander most of my life, and our state flower has always been a favorite. I used yellow silk ribbon stitches to create the petals' pearl cotton knots for the centers. 

Did you know that the black-eyed Susan was chosen as Maryland's state flower because it has the same colors as part of our state flag; it has an average of 13 petals, and MD was one of the original 13 states; and, it usually blooms on or around Independence Day? You are welcome for that piece of fascinating trivia!

I wanted to pull some of the purples that were throughout the quilt, so I chose salvia as another flower to stitch. I used pearl cotton to create the stems and leaves, and stacked fly stitches topped with a French knot for the blooms. I highlighted the purple pearl cotton that I used with a strand of light purple, so the blooms would pop a bit more. The purple I chose seemed to be so dark that it nearly disappeared, and adding the lighter color helped.


I also knew I wanted to include daisies, so I moved to the other side of the wheelbarrow and created the daisies using—of course—lazy daisy stitches. I varied the number of petals, to keep it interesting and to better fill the space. I used yellow ribbon French knots for the centers, but you could just as easily use floss or pearl cotton. The leaves are green ribbon stitches with silk ribbon.

The bullion roses were a new technique that we learned in class. I started with two yellow bullion stitches in the center, and then used a variegated pink to create the outer petals with overlapping bullion stitches. The buds were created using just two or three bullions. The calyxes were also made of bullion knots, using green pearl. I filled in the space with a few French knots. Be sure that you are wrapping the thread around the needle more times than you need to fill the space, so that it creates a curved stitch that will nestle around the previous stitches. And using a milliner's needle (size 1, 3, or 5) will make these knots SO much easier and more enjoyable!! It is much easier to pull this needle through all the wraps on the needle because the entire shaft is the same width. Ask me how I learned NOT to try these knots with a chenille needle... For a tutorial on making a bullion rose, click here or here.


The remaining space was filled in with lavender. I love lavender, and I know that I have taken photos of it in the past, but unfortunately, I couldn't locate any of them to share. To stitch it, I filled the area with small feather stitches using green wool thread, and then I just randomly made the lavender French knots throughout the section. Lavender is a great filler, both in a dirty garden and a stitched one! The stitched lavender does miss that wonderful aroma, though.

The wheelbarrow was finished, but my birdhouse needed a bird. I decided to add some yellow and make a goldfinch. He flew down and perched on the tire before going into his house. To stitch him, I outlined the body with an outline stitch and filled it with yellow stem stitches and straight stitches. I followed a photo I had taken to add the black and white wings and the black top of his head. A French knot with a small white stitch formed his twinkling eye. I used a pale orange floss to make his beak and claws. I think he's pretty cute!


One of the hardest things for me to learn when we started embroidering blooms with a variety of ribbons and threads is that there is likely to be a fair amount of variation. If I absolutely HATE the way a wonky stitch makes me feel when I look at it, I un-stitch. But more often than not, I keep stitching, and when the piece is finished, what looked horrid to me at first becomes hardly noticeable—even to me. I have spent a lot of time in gardens taking pictures of flowers, and I have come to realize that few of them are perfect. Well, they ARE perfect—in their imperfection! The petals are not all the same size or shape, bugs eat holes in some of them, the wind blows some away. While there are times that I redo a flower or two, especially when I am experimenting, a lot of times, I surprise myself and find that what I first considered a mistake just added some realistic charm to my garden. 

If you have ever taken a class with us, you know that we love to discuss the organic nature of our flower-stitching. I saw this plaque yesterday while I was shopping and thought it a perfect mantra. Remember: 

Stitching is supposed to be fun! Enjoy the organic nature of your garden.

Our Wheelbarrow of Flowers pattern is now available on our website, along with the other blocks in the series. As always, the hard copy of the pattern includes the ribbon needed to make the block. Next month, we will be creating a top border for our quilt, and we will discuss assembling the In the Garden quilt. We are almost finished!

Wheelbarrow of Flowers

To read more about our other blocks in the series, click on the links below.


We would love to see you In the Garden!